Showing posts with label baking. Show all posts

Thursday, August 22, 2019

Berry happy returns.

Hi, it's me again!

Where did we leave things last? Oh right, I was nine days from Bun's arrival...which turned into 17 days. Going stir crazy, I wrapped things up at work to focus on willing the baby into the world (as the stern nurse ordered). Mom arrived a week before our due date ("I think you'll be on time or early!"), and to pass the time we made dumplings, filled the freezer with post-partum meals, and baked cookies to share with hospital staff. Nick and I took walks and ate spicy food, to no avail. Mercifully they induced me at a week overdue, all went well, and we brought our sweet Charlotte home Monday morning.

The last nearly eleven months have been a blur -- maternity leave was suddenly over (I had grand plans to learn to bake bread...I'll give you one guess as to how that turned out), and we were learning how to be working parents. Charlotte is healthy, happy, and (surprising no one) a big eater. Introducing various solids has been super fun, but cooking for us and coming up with Charlotte-friendly snacks doesn't leave a ton of room for recreational cooking / baking.

Last weekend we visited friends with a three-year-old and seven-month-old twins. Given Charlotte's in what my sister calls the "Golden Age of Baby" where she's still relatively easy to supervise and takes reasonable weekend naps, I seized on the opportunity and baked something other than lactation cookies for the first time in nearly a year.

You may remember my undying love for local strawberries -- I was so excited when *proper* strawberry season arrived and I could introduce Charlotte to them.

The cupcakes we brought over to our friends' house were not only berry-ful in the cake batter, but topped with a crown of strawberry cream cheese frosting. The three-year-old solemnly declared them "the most exciting cupcakes I have ever seen" and tucked his away with a speed which reassured me I hadn't lost my touch. Indeed, I found them to be the perfect vehicle to highlight the summer's bounty. The cake was velvety and not a bit dry, and the frosting was decadent but not too sweet.


*

Fresh Strawberry Cupcakes with Strawberry Cream Cheese Frosting
from the Butternut Bakery Blog
(Originally a sheet cake, this is the ultimate unfussy summer dessert.)

Cupcakes
2 c all-purpose flour
3/4 c cake flour
2 t baking powder
1/2 t baking soda
1/2 t salt
3/4 c vegetable oil
1 3/4 c granulated sugar
4 large eggs
1 1/2 c lightly pureed strawberries (pulse in a food processor until just a few small chunks remain)
1 t vanilla extract

Strawberry cream cheese frosting
8 oz cream cheese, room temperature
1/2 c unsalted butter, room temperature
3–4 c powdered sugar
1/4 c lightly pureed strawberries

Preheat oven to 350*F and line a cupcake pan with cupcake wrappers. Whisk together all-purpose flour, cake flour, baking powder, baking soda, and salt. In another (large) bowl, whisk together the oil, sugar, eggs, strawberry puree, and vanilla extract. Fold dry ingredients into wet until barely mixed.

Pour batter into cupcake wrappers (this recipe made about 24 standard cupcakes). Bake for 15-18 min. or until a toothpick in the center comes out clean with a few crumbs clinging to the toothpick. Let cupcakes cool completely before frosting.

Using an electric mixer, cream together cream cheese and butter. Mix in two cups of powdered sugar, one cup at a time, then the strawberry puree. Add more powdered sugar until you've reached desired thickness. I added just a pinch of salt to bring out more of the strawberry flavor. Slather and serve!


Sunday, July 8, 2018

Some good ombre.

Week 29! Time is flying by. I'm happy to report that our list of pre-Bun to-dos is quickly shrinking, seemingly directly proportionally to the speed of my growing belly (I can't see my feet anymore when I look down). Making up for lost time in the first few months, I've been cooking and baking up a storm. Most recently, Nick's whole family visited a few weeks ago -- the Bev and Breakfast was at full occupancy -- and we celebrated not one, not two, but three June birthdays. With ambition I'll only ever be able to achieve fueled by pregnancy hormones, I made three birthday cakes...well, two cakes and a batch of cupcakes. Two recipes I have down pretty well by now:
  • For Nick -- upon request -- the London Fog chocolate cake with Earl Grey-vanilla buttercream and salted caramel made another appearance:
  • For one sister-in-law, I made a batch of lemon cupcakes with fresh blackberry buttercream:

For my other sister-in-law, I tried something new. She 1) tends not to love super-sweet/thick frosting (happy to play clean-up crew anytime), 2) loves coffee, 3) was about to head off for a fabulous Eurotrip and 4) for a few years has had balayage highlights which create an awesome ombre effect in her long, brown hair. Add the inspiration together, and I give you ombre tiramisu cake:
  

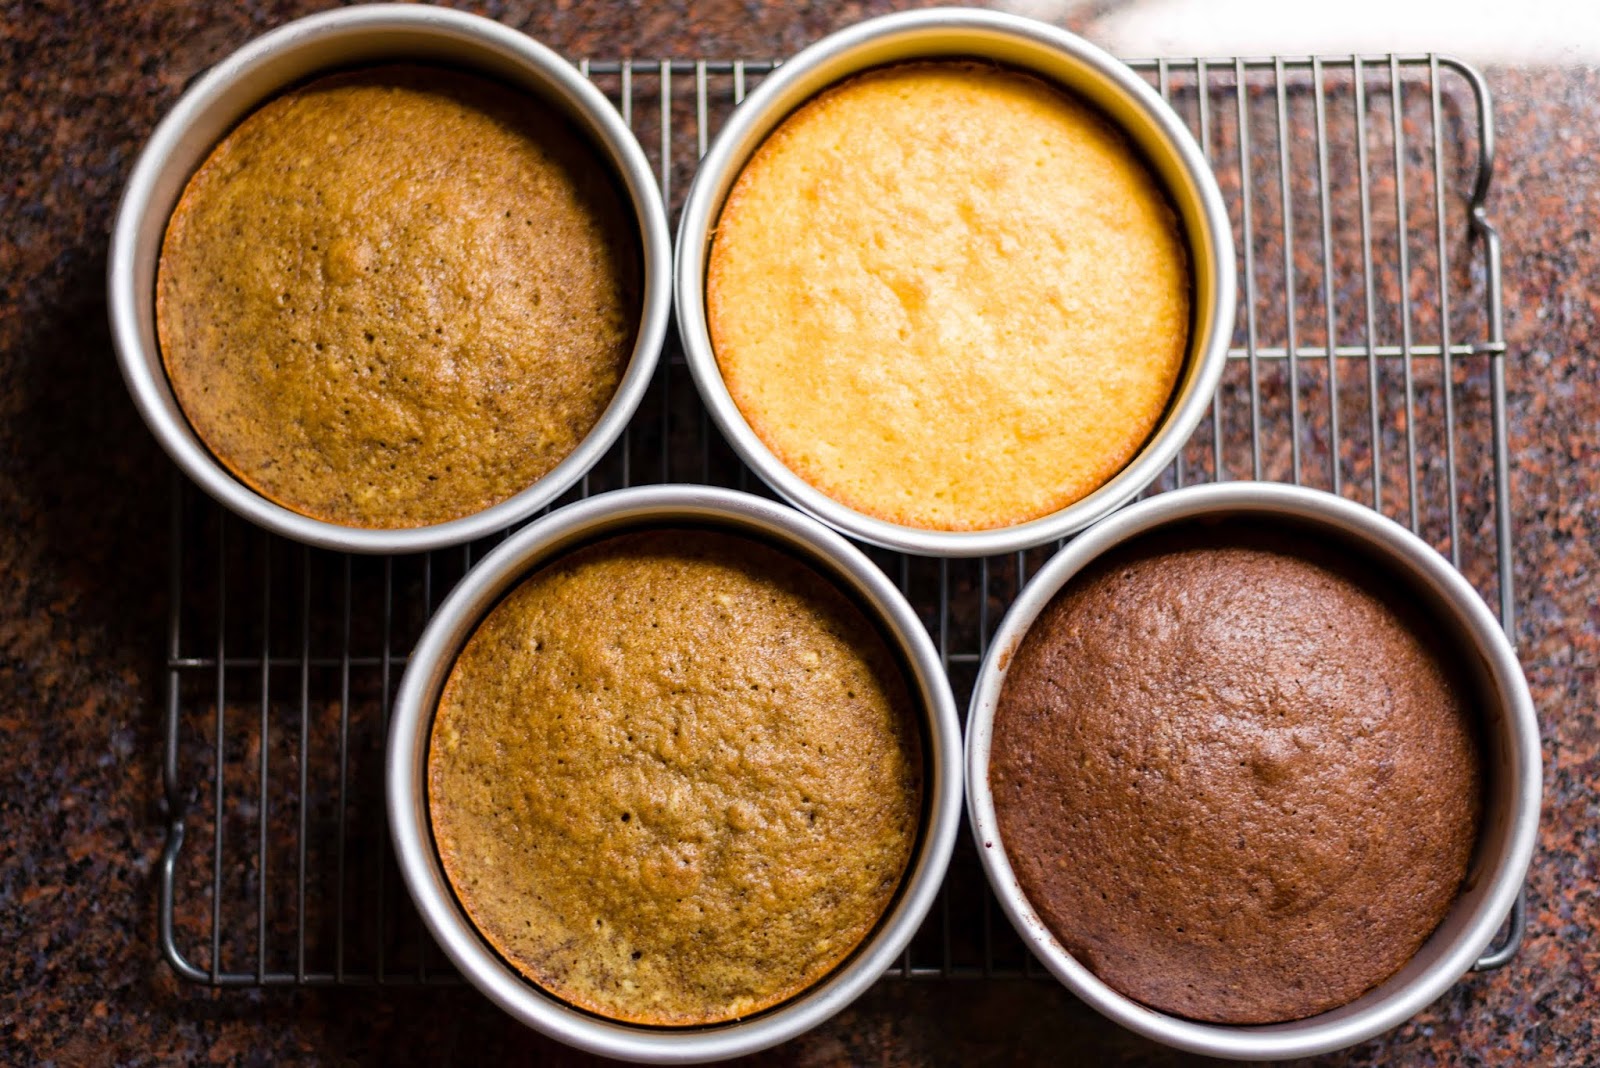
I've had this amazing cake book (as delicious to look at as to eat from) for a while now, and often what I find makes her cakes so stunning is that the author actually makes small-diameter, sky-high stacked cakes. The easiest way to achieve that is using a bunch of smaller pans, so this was the perfect opportunity to buy four, six-inch rounds (what's a house in the suburbs for, if not to have storage for a growing collection of cake pans?). I ultimately used a different recipe than one in the book to achieve a more "pure" tiramisu and ombre effect, and for my first time making it, I was quite pleased with how it came out.

These little cuties made four tiny layers: one vanilla, two coffee and one chocolate:

The secret weapon of this recipe is espresso powder (available in many grocery stores), which is used in every element of the cake:
It dissolves easily into whatever you've stirred it into, making it ideal for batters, liquids and even frosting -- all the flavor, zero graininess.

  • How do you make three different types of cake with one recipe? By making one big batch of vanilla batter, then stirring in some espresso powder and cocoa into the corresponding layers.
  • Then tiramisu (can I use that as a verb?) it all by painting the layers of cake with generous swipes of espresso syrup during assembly.
  • The frosting is a not-too-sweet, also-layered mascarpone that ombres (taking another verb liberty) from vanilla to espresso to chocolate, swirling and blending sections together along the height of the cake sides.
  • For an authentic finish, pipe remaining frosting into little dollops on top and sprinkle with cocoa, that handy espresso powder and a touch of powdered sugar.
...all creating an ombre homage for a Very Special birthday girl.

Thursday, March 16, 2017

Work from home skillet.

Snow in March. I suppose that's just normal New England weather, right?

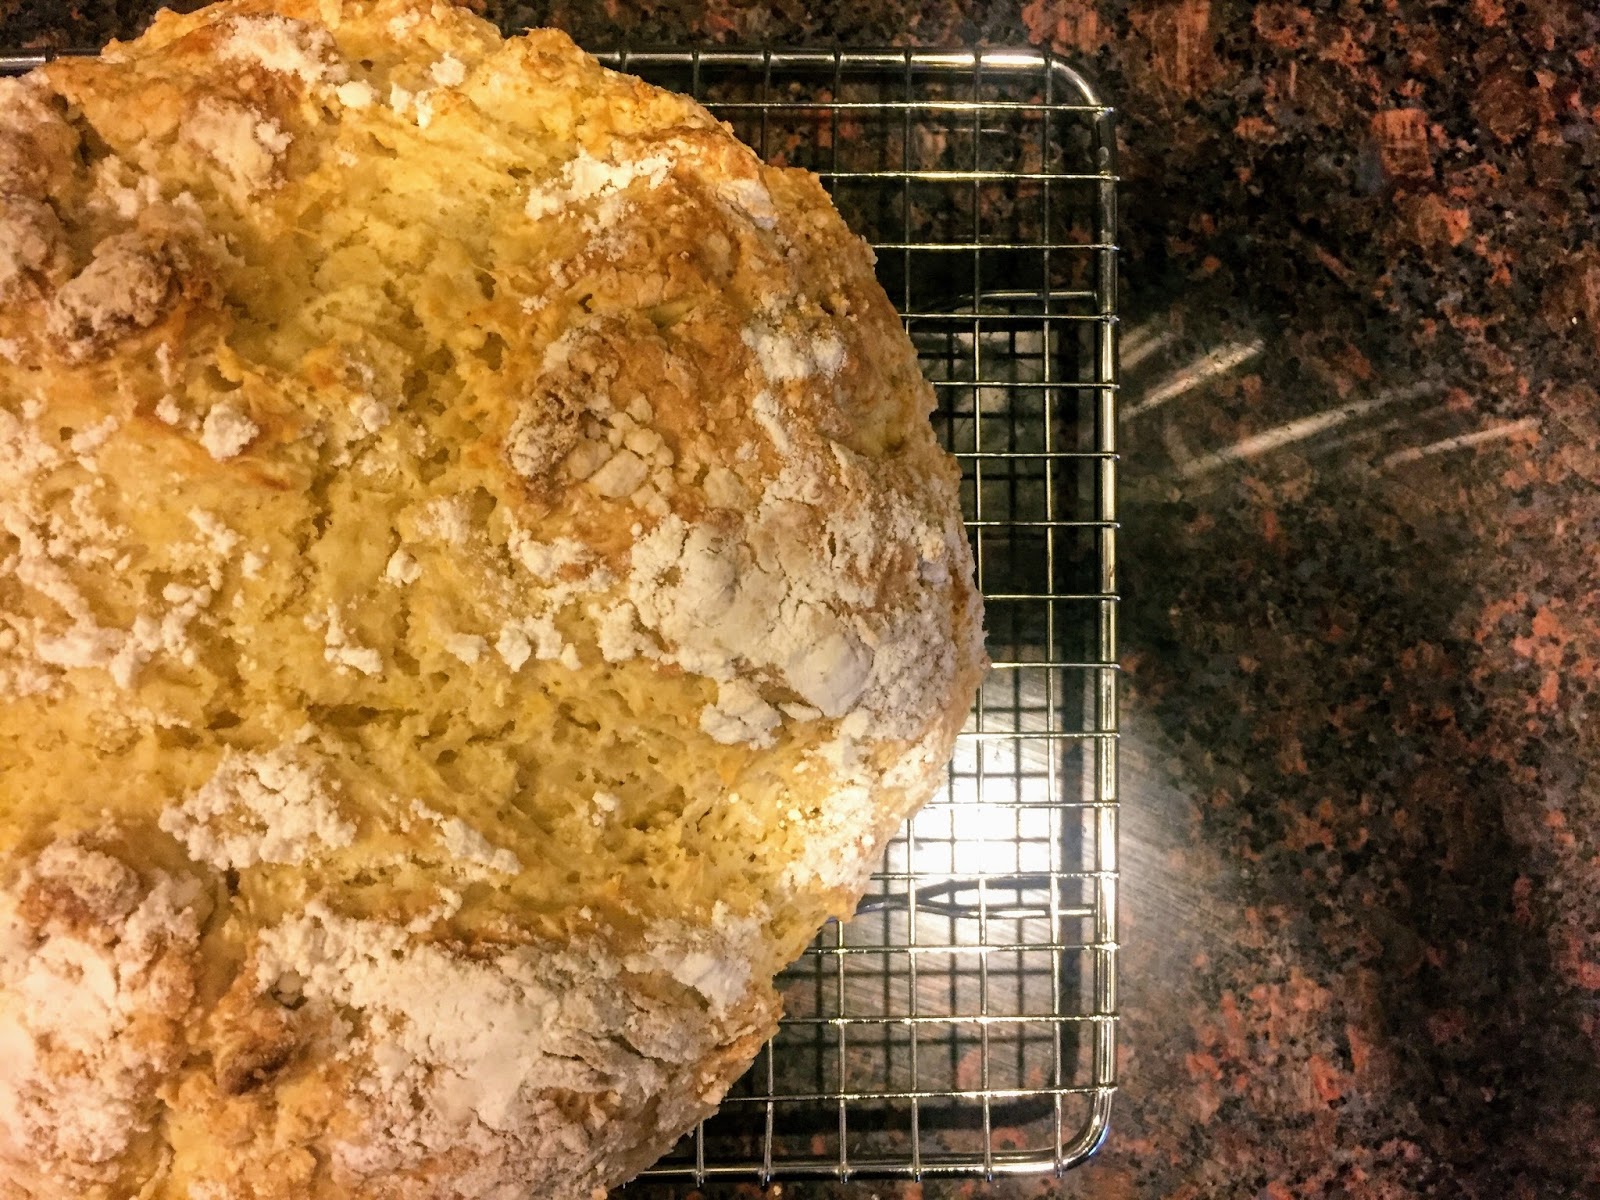
Tuesday marked our ~fourth snow day of the year. What that typically means is that Nick and I creep closer and closer to the fireplace all day long until we're toasting the bottoms of our feet by 5pm. I'm one of the fortunate type who is wildly productive working from home -- of course, we all have our days, but I'm batting a strong average for Winter 2016-2017. And it's not limited to work productivity; this week, for instance: by the time I'm normally rolling into the office (~9am), I had 1) slept an extra hour, 2) done a deck of cards workout, 3) baked a loaf of Irish soda bread and 4) sat down to work.

For those who observe the holiday, Tuesday was also Pi Day: 3.14. Having nothing really appropriate to fill a pie (I planned poorly), and also trying to use up some buttermilk from recent baking adventures (perhaps I planned well after all), I honored math's most popular ratio by bookending my day baking quick breads in a round cast iron skillet. Two breads in one day? Yes, you can have it all.

***A few words about quick breads: While not providing quite the same springy, crusty, airy satisfaction of yeast breads, quick breads are delicious in their own right and (as you might have guessed) quick: no time to rise, very little time to mix up. They get their leavening from baking soda mixed with acid (in my case, buttermilk), and if you use a cast iron skillet, you get a satisfyingly crusty bottom from the even, direct heat of the pan.

In addition to Pi Day traditions and celebration, about half way through the day our next door neighbor rang the doorbell to induct us into a time-honored neighborhood snow-day tradition: impromptu potluck dinners. I was at first excited and then immediately overcome by panic that I had nothing to bring, scant ingredients in my fridge, and a good amount of work left in the day. Cast iron skillet to the rescue again! I had just made a huge batch of chili on Sunday, so I dug some out of the freezer (I would normally never dream of bringing "leftovers" to a potluck, but chili is better leftover anyway), and decided to make cornbread as a side.

Look how perfectly I was able to use up the last drop of buttermilk on the second round (see recipe below for proof):

The best part of a snow day social? It has to be just a few steps from home, so we could stay longer and enjoy the excellent company with a glass of wine (or two).

Irish soda bread:


Cast Iron Skillet Cornbread:


*
(Food52 cornbread contest recipe winner from boozeandsusan)

1 1/2 c coarse yellow cornmeal
3/4 t baking soda
1/2 t coarse salt
2 large eggs
1 1/2 c buttermilk
1 1/2 c T maple syrup
4 T unsalted butter

Preheat an oven to 425*F. Heat a 9-10" seasoned cast-iron skillet in the oven for 10 min., until very hot. 

Combine cornmeal, baking soda and salt in a bowl. In a separate, large bowl, whisk together eggs, buttermilk and maple syrup. Remove the hot skillet from the oven and add the butter, swirling until it's melted. Working quickly, pour the hot, melted butter into the egg and buttermilk mixture, and whisk until combined. Add dry ingredients and whisk until just combined.

Pour the batter into the hot skillet and and bake until golden, 20-25 minutes. Allow cornbread to slightly cool before cutting.

Tuesday, December 29, 2015

This dessert is making a comeback, don't Juneau?


Happiest of holidays, readers! We've been a bit crazy as usual this time of year, but I insisted on making time for a post before heading home for new year's with my family. We spent Christmas with Nick's side, our second Christmas celebrated together.

Kicking off the holiday season, we broke with tradition and stayed put for Thanksgiving - our annual Friendsgiving was combined with a holiday party in December, so we had an intimate Thanksgiving for two on Thursday, and Famsgiving with my sister and her fiance over the weekend. As you may remember, I do love the big, bang-up Thanksgiving with more people than you can fit at a normal-sized table, but there were benefits of this year's setup too:
  1. We stuck with the traditionally sized bird (for just the four of us) and had all the leftovers to ourselves!
  2. Two Thanksgivings allowed us to have some fun with alternate turkey approaches: (turkey schnitzel with leeks and butter-sage sauce, served with gnocchi instead of more traditional potatoes)
  3. ...AND two desserts: I tried my hand at French Silk pie (Nick's favorite since childhood), and fewer diners also meant I could pull off a higher-maintenance dessert...
...mini Baked Alaskas.

I've been hearing more and more this fall that Baked Alaska is making a comeback. A warm-on-the-outside scoop of ice cream seems appropriate for this crazy El Nino weather pattern we're having this winter. For those of you unfamiliar with this throwback dessert, Baked Alaska is traditionally a piece of cake topped with ice cream, smothered in meringue and fired until the outside is toasty but the ice cream is still nice and cold, insulated by the meringue.

Sure, they require some specialized equipment (the torch), and I wouldn't recommend this dessert for a crowd, but I had a lot of fun adapting a few recipes to make a Thanksgiving-themed Baked Alaska:
  • The ice cream: Three different flavors (we each sampled each other's and passed the plates around): homemade pumpkin ice cream (replaced the canned pumpkin with a real pumpkin from our fall CSA stash), ginger ice cream, chocolate ice cream
  • The cake: Chocolate chip pumpkin bread (adapted from my favorite recipe: I added the chocolate chips and a dash more of each of the spices)
  • The meringue: Nothing special here (whip 3 egg whites and 1/3 c sugar to soft peaks, streaming in sugar as you go).
Tips for mini-baked-Alaskan success:
  • Cut out circles of cake and top with ice cream a day in advance (I used a 2.5" biscuit cutter and a medium ice cream scoop)
  • You'll want to turn your freezer to MAX POWER to freeze the ice cream as hard as possible overnight (remember you're going to be torching the thing, meringue insulation aside)
  • Wait until the next day to do the meringue - that way it won't develop condensation or deflate
  • Just before serving, slather the meringue on thickly (using a fork to give it lots of cool ridges and dimension)
  • Be fearless with the torch - you really want that nice toasted marshmallow look.


Sunday, October 11, 2015

Dinner part(y)ing.

Leaves are changing, jobs are changing (wish me luck on my first day of the new gig Tuesday!), times are changing...last month we said "see you soon" (because I refused to say "farewell") to two dear friends both moving west. Janet and Michael have been a huge part of our lives since moving to Boston, so a proper send-off was in order. The theme of our little gathering was fairly simple: "things we like to eat together." Those who have been following Food and Bev for a while know that family and friendship are at the core of my food exploits - so it was easy come up with a meaningful menu.

Rules for any dinner party (more comprehensive tips here):
  1. Make it scale (don't attempt anything with precise timing/requiring individual attention, especially if you have a larger group)
  2. Make it personal (remember your guests' preferences; bonus points for nostalgia)
  3. Make it tasty (a given)
Here's what we ate:

Pork bulgogi dumplings in bacon broth with baby bok choy: (in honor of many bulgogi cookouts at Mehul's place, shared Chinese New Year feast dumplings, and the time we had stocked up on one pack of bacon per person at a lake house in New Hampshire)


My new favorite fried chicken with biscuits, bourbon caramel drizzle, mustard greens salad with pickled peaches: (commemorating many a Bev's brunch biscuit, peach picking and comfort food in general)


S'mores cake (graham cracker layer cake with marshmallow and dark chocolate buttercream - I got to use my hand torch!): (as an homage to our group's tradition of toasting marshmallows whenever getting near/sometimes creating our own open flame)


We look forward to their early/often returns!

Sunday, May 10, 2015

Wishing you a very berry Mother's Day.


Happy Mother's Day! Unfortunately living quite far from my parents, we weren't able to celebrate together, but I channeled Mom all the same.

As I've mentioned before, birthday cakes are big in my family. On my dad's birthday when they were first dating, my mom baked him a strawberry shortcake, and he was so surprised because it had been years since he'd had a birthday cake.

When a friend invited us over for a dinner party this week, I offered to bring dessert. I've been making the same two cakes for quite a while now, so I was looking for something new, light and refreshing (the temperature shot up to nearly 90 degrees today). I found just what I was looking for on my latest obsession, Food52: a strawberry shortcake. I nearly forgot about our family connection until I called my mom today and she asked me how I was spending my afternoon.

"Strawberry shortcake" is a bit of a misnomer - I'd prefer to call it a strawberry "tallcake," because the four proud strata reach pretty impressive heights (it scraped the top of my cake box I used to transport it to the party). Rather than plain whipped cream, this recipe calls for you to fold in some softened mascarpone cheese, which was a fabulous addition in my opinion, giving the cream more body and a velvety richness. The yogurt in the cake itself kept it from drying out and gave it a nice crumb as well.


*

Strawberry (Tall)cake

Cake:
12 T unsalted butter, softened
1 3/4 c granulated sugar
4 eggs
3/4 c sour cream or full-fat yogurt
Zest of one lemon
1 t vanilla extract
2 c all-purpose flour
1/4 c cornstarch
1 t baking soda
1/2 t salt

Filling:
1 qt strawberries
2 to 4 T granulated sugar
8 oz mascarpone cheese, softened
2 c heavy cream (an extra cup if you plan to frost the outside of the cake)
1 t vanilla extract

Cake: If you have time, bake the cake a day ahead and freeze for easier handling - it's pretty delicate cake.
Preheat the oven to 350*F. Prepare two 8" round pans: grease and line with parchment, then dust with flour. Cream the butter and sugar together on high speed for about 5 min. Meanwhile, sift together flour, cornstarch, baking soda and salt. Add eggs, one at a time, to the creamed butter and sugar mixture, scraping down the sides of the bowl as you go. Add yogurt, lemon zest and vanilla to the batter and mix until just combined. Add the flour mixture on slow speed in three batches. Take care not to overmix. Divide batter into two pans and bake for 25-30 min., or until an inserted toothpick comes out clean. Let cool in pans for 10 minutes and then invert onto wire racks to finish cooling.

Filling:
Wash, hull and slice strawberries. Macerate for at least 15 min. with sugar. I strained mine (saving the sweet strawberry juice for future cocktails) so as not to make the cake soggy.

Whip cream until soft peaks form. Add sugar and vanilla and whip just a bit longer, then gently fold in mascarpone.

Assemble: Don't assemble the cake until the day you plan to eat it, no more than a few hours in advance (ideally) - otherwise at least leave the strawberries off the top of the cake until later for maximum perkiness.
Slice the cooled cakes in half to form four layers. Build each layer at a time, starting with cake, spreading with the cream mixture and a layer of macerated strawberries. I made extra whipped cream and decorated the outside, but Food52's recipe leaves it charmingly rustic and hipster-looking.

Monday, September 16, 2013

Millions of peaches.


I think we may have made an official tradition: fruit picking on my birthday weekend. This year was extra special, with a trip to my first peach grove. I won't further belabor the point about how much I love peaches, but I was in stone fruit heaven.


Ward's Berry Farm is a fabulous farm whose bins overflow with enormous pumpkins, fat butternut squashes, perfectly sour Concord grapes, and, of course, jewel-like berries. We got lucky: the weather was gorgeous, we had a very nice (unofficial) tour guide, and I think we picked the very last of all of New England's peaches. Our guide walked us through the back areas of the operation, tossing plump cherry tomatoes at us and cutting off pieces of ripe fruit with a pocket knife. He showed us what we were looking for in a ripe peach:

  • barely firm fruit that "gives" with a (very) slight squeeze
  • a warm, fuzzy, sun-warmed fragrance
  • and the most important thing -- in addition to a nice rosy blush, a sunny yellow undertone. (Even if a greenish-yellow foundation is blooming red, it might just be pretending, as the redness is attributed to exposure to the sun...only part of the ripening process.)
Our friend advised us that we would find some of the best peaches on the ground -- just brush off the (dry) soil, and voila. Occasionally we would have to fight Nature for a really good-looking one, but sometimes we would also get lucky and hear the soft thud of a just-ripe peach before it had been claimed. We also found plenty on the tree after all, but it was quite different from other fruit-picking experiences I've had.

We did a pretty good job. (Don't worry, these aren't all mine.)

We threw a few on the grill with our fellow peach-pickers: ("marinated" first)


And I whipped up a batch of brown-butter peach scones when I got home. The scones were a little more like a quick bread than a scone (I prefer my scones with a good crust all around), but they were delicious nonetheless. Big sugar crystals on top give a nice crunch.

*

Brown-Butter Peach Scones
from AskChefDennis.com and Tutti Dolci

Makes 2 dozen

10 T unsalted butter
4 c all-purpose flour
2/3 c sugar
4 t baking powder
1 t baking soda
1/2 t salt
1/2 t cinnamon
2 c diced peaches
1 1/3 c low-fat buttermilk
2 large eggs
1 t vanilla extract
1 T turbinado sugar

Melt butter in a heavy saucepan over medium heat, stirring constantly until it foams, turns clear, and then turns a deep brown, about 6 min. Pour browned butter into a glass dish and chill in the freezer until solid and chilled, about 1½ hr.

Preheat oven to 400*F and line a baking sheet with parchment paper. Whisk together flour, sugar, baking powder, baking soda, salt, and cinnamon in a large bowl.

Dice chilled brown butter into small pieces; sprinkle over flour mixture and use a pastry cutter to cut in evenly until mixture resembles coarse meal. Dry peaches between layers of paper towels; add to flour mixture, folding in gently.

Whisk together buttermilk, egg, and vanilla extract in a small bowl; add to flour mixture and fold in just until incorporated. Use a floured bench scraper (or rubber spatula) to scrape dough out onto prepared baking sheet; generously flour hands and pat dough into an 1.5" thick round.

Score deeply into 24-48 pieces (depending on what size you want) with a knife; sprinkle dough with turbinado sugar. Bake 20-25 min., or until golden. Cool 2 min. on baking sheet, then carefully transfer to wire rack to cool before cutting completely.