Showing posts with label holidays. Show all posts

Monday, February 19, 2018

China, Part I: Family roots BINGO (NINGBO).

Where has the time gone? Since my last blog-delay excuses, we’ve celebrated Christmas and New Year, welcomed my sweet nephew (Simon), and I went on a work trip. Friday we celebrated Chinese New Year with a fabulous double-hot pot at a friend’s house and rang in the Year of the Dog.

Taking advantage of the long weekend and holiday spirit, I decided to get started on a long-overdue mini-series of posts about our China trip from the fall. Over 20 years ago, I visited Hong Kong for the first time with my family: it was a couple years before the Handover, and I was too young (and it was too hot – who visits Hong Kong and Singapore in July??) to appreciate much besides frequent trips to Häagen Dazs with my uncle.

My parents have gone back quite a few times, and I’ve wanted to go with them in the past, but it’s a minimum two-week commitment for which Nick and I have rarely had vacation days to spare (after years of long-distance, there was our honeymoon to account for, plus our India trip…poor us). This year neither of us had changed jobs recently (hurray!), so we accrued enough vacation time to put toward a seventeen-day trip to Asia. I jokingly called it "birthright," but in a way it was pretty appropriate given how much family history and culture we go to see:
  • My parents both grew up in Hong Kong
  • Their pre-Hong Kong families were from villages (Shanjielingcun and Jhong Cun) near Ningbo…
  • …Which makes us culturally Shanghainese…
  • …and you kind of can’t go to China without visiting Beijing
There’s so much to see and do (and eat) in just seventeen days, so we did a good amount of planning with Mom and Dad in advance, making the “must-do” list by city. OR, as I retrospectively put together, the “Family Roots BINGO” card (or, in our case, NINGBO) to summarize (gray boxes indicate food experiences/click to view larger image):

(NINGBO card footnotes* below.)

While this quick summary hardly captures all of our adventures, it's safe to say that we wouldn't have had nearly as rich (nor tasty) an adventure if Nick and I had tried to go alone. We were so lucky to have my parents as tour guides for this trip, and it's one we'll remember for a long time.

* NINGBO Card Footnotes *

Ningbo
  • Nian Gao: Sliced rice cakes, or pretty much the best thing ever. They're a little chewy, almost like gnocchi, and they can be sweet or savory, in soup or stir-fried. While you'll find them in Korea, Japan and other parts of China, nian gao is kind of a regional specialty.
  • Wong Family Plot: The grave site of my Mom's grandfather, about an hour outside Ningbo -- my parents had just learned about it in the last couple years and had the site restored.
  • Dragon Well Tea: A specialty green tea, the regionally protected (A.K.A. the Champagne of Dragon Well) is "Dragon Tongue" tea. We drank lots of this in Ningbo, and we also visited the beautiful, rolling tea fields.
  • Chu Ancestral Hall: 30+ generations of my dad's side of the family are commemorated in a building, another hour outside Ningbo, where each generation's family historian keeps track of male lineage chiseled into a marble wall (and the rest of us are written in a book) -- yes, this is for real -- another gem our family just discovered in the last couple years.
  • "Bivalves": These suspicious-looking freshwater creatures are also a local delicacy...known as "blood cockles," they contain a red liquid that (only) looks like blood. Try anything once?
Shanghai
  • Xiaolong Bao: Soup dumplings! Delicate wrappers stuffed with pork, cabbage and aromatics sitting in a puddle of delicious broth which should be slurped out before enjoying the rest. These were at a tiny restaurant in Shanghai (Dad asked the hotel concierge, "Where do you eat around here?").
  • Xintiandi: A.K.A. the "French Concession," or old French Quarter, this little European-style part of Shanghai is a posh restaurant and shopping district, known also for being home to the site of the first congress of the Communist Party of China.
  • The Bund: The waterfront district of downtown Shanghai, where the famous skyline sits.
  • Yu Yuan: A gorgeous garden in Old Shanghai, complete with a snaking dragon which tops the extensive garden walls.
  • Nanjing E-W Road: A famous shopping street which runs, you guessed it, East-West through the city. This night photo shows the sign of the watch company where my dad's father apprenticed.

Hong Kong
  • Peninsula Hotel: On the Kowloon side, this famous hotel opened in 1928 and was the site of historic meetings during WWII...my mom's dad's company once made furniture, upholstery and drapes here.
  • Mom's School: St. Paul's Co-Ed; this is the view from the Peak Tram (Nick's fancy camera snagged it, even in motion). Fun fact, said in (my) sloppy Cantonese, "St. Paul" gets mispronounced, "St. Pineapple."
  • Won Ton Mein: FREE SPACE!! This Cantonese specialty is everywhere in Hong Kong (this particular bowl is at the top of Victoria Peak at Mak's Noodle).
  • Victoria Peak: The highest mountain on Hong Kong Island (1,811 ft.) and a gorgeous park for walking and taking in views of the city and harbor below.
  • Dad's School: St. Stephen's boarding school, located in Stanley.
Beijing
  • Peking Duck: Duck-adent dinner at Da Dong, absolutely fantastic and classic preparation of crispy skin, juicy meat, paper-thin pancakes and fixings (for those who have never had Peking duck, it's kind of like the most amazing delicate fried chicken wrapped in a taco...what's not to love?)
  • Great Wall: One of the Wonders of the World (by a few different classifications)...there are multiple tourist entrances, and apparently we picked the steepest one. Took us a couple hours to climb up, and under an hour to get down, to give a sense of scale.
  • Tiananmen Square: (Translates to "Gate of Heavenly Peace") Massive physical and historic presence, heavily guarded.
  • Forbidden City: Historic Emperor's palace which today lets in 80,000 visitors per day to see museum galleries of artifacts, jewelry, ceramics, clocks and more.
  • Tian Tan: Temple of Heaven and gorgeous surrounding gardens. It took us three tries to get in per the confusing schedule, but we made it eventually and were rewarded by the sights.

Thursday, March 16, 2017

Work from home skillet.

Snow in March. I suppose that's just normal New England weather, right?

Tuesday marked our ~fourth snow day of the year. What that typically means is that Nick and I creep closer and closer to the fireplace all day long until we're toasting the bottoms of our feet by 5pm. I'm one of the fortunate type who is wildly productive working from home -- of course, we all have our days, but I'm batting a strong average for Winter 2016-2017. And it's not limited to work productivity; this week, for instance: by the time I'm normally rolling into the office (~9am), I had 1) slept an extra hour, 2) done a deck of cards workout, 3) baked a loaf of Irish soda bread and 4) sat down to work.

For those who observe the holiday, Tuesday was also Pi Day: 3.14. Having nothing really appropriate to fill a pie (I planned poorly), and also trying to use up some buttermilk from recent baking adventures (perhaps I planned well after all), I honored math's most popular ratio by bookending my day baking quick breads in a round cast iron skillet. Two breads in one day? Yes, you can have it all.

***A few words about quick breads: While not providing quite the same springy, crusty, airy satisfaction of yeast breads, quick breads are delicious in their own right and (as you might have guessed) quick: no time to rise, very little time to mix up. They get their leavening from baking soda mixed with acid (in my case, buttermilk), and if you use a cast iron skillet, you get a satisfyingly crusty bottom from the even, direct heat of the pan.

In addition to Pi Day traditions and celebration, about half way through the day our next door neighbor rang the doorbell to induct us into a time-honored neighborhood snow-day tradition: impromptu potluck dinners. I was at first excited and then immediately overcome by panic that I had nothing to bring, scant ingredients in my fridge, and a good amount of work left in the day. Cast iron skillet to the rescue again! I had just made a huge batch of chili on Sunday, so I dug some out of the freezer (I would normally never dream of bringing "leftovers" to a potluck, but chili is better leftover anyway), and decided to make cornbread as a side.

Look how perfectly I was able to use up the last drop of buttermilk on the second round (see recipe below for proof):

The best part of a snow day social? It has to be just a few steps from home, so we could stay longer and enjoy the excellent company with a glass of wine (or two).

Irish soda bread:


Cast Iron Skillet Cornbread:


*
(Food52 cornbread contest recipe winner from boozeandsusan)

1 1/2 c coarse yellow cornmeal
3/4 t baking soda
1/2 t coarse salt
2 large eggs
1 1/2 c buttermilk
1 1/2 c T maple syrup
4 T unsalted butter

Preheat an oven to 425*F. Heat a 9-10" seasoned cast-iron skillet in the oven for 10 min., until very hot. 

Combine cornmeal, baking soda and salt in a bowl. In a separate, large bowl, whisk together eggs, buttermilk and maple syrup. Remove the hot skillet from the oven and add the butter, swirling until it's melted. Working quickly, pour the hot, melted butter into the egg and buttermilk mixture, and whisk until combined. Add dry ingredients and whisk until just combined.

Pour the batter into the hot skillet and and bake until golden, 20-25 minutes. Allow cornbread to slightly cool before cutting.

Tuesday, December 29, 2015

This dessert is making a comeback, don't Juneau?


Happiest of holidays, readers! We've been a bit crazy as usual this time of year, but I insisted on making time for a post before heading home for new year's with my family. We spent Christmas with Nick's side, our second Christmas celebrated together.

Kicking off the holiday season, we broke with tradition and stayed put for Thanksgiving - our annual Friendsgiving was combined with a holiday party in December, so we had an intimate Thanksgiving for two on Thursday, and Famsgiving with my sister and her fiance over the weekend. As you may remember, I do love the big, bang-up Thanksgiving with more people than you can fit at a normal-sized table, but there were benefits of this year's setup too:
  1. We stuck with the traditionally sized bird (for just the four of us) and had all the leftovers to ourselves!
  2. Two Thanksgivings allowed us to have some fun with alternate turkey approaches: (turkey schnitzel with leeks and butter-sage sauce, served with gnocchi instead of more traditional potatoes)
  3. ...AND two desserts: I tried my hand at French Silk pie (Nick's favorite since childhood), and fewer diners also meant I could pull off a higher-maintenance dessert...
...mini Baked Alaskas.

I've been hearing more and more this fall that Baked Alaska is making a comeback. A warm-on-the-outside scoop of ice cream seems appropriate for this crazy El Nino weather pattern we're having this winter. For those of you unfamiliar with this throwback dessert, Baked Alaska is traditionally a piece of cake topped with ice cream, smothered in meringue and fired until the outside is toasty but the ice cream is still nice and cold, insulated by the meringue.

Sure, they require some specialized equipment (the torch), and I wouldn't recommend this dessert for a crowd, but I had a lot of fun adapting a few recipes to make a Thanksgiving-themed Baked Alaska:
  • The ice cream: Three different flavors (we each sampled each other's and passed the plates around): homemade pumpkin ice cream (replaced the canned pumpkin with a real pumpkin from our fall CSA stash), ginger ice cream, chocolate ice cream
  • The cake: Chocolate chip pumpkin bread (adapted from my favorite recipe: I added the chocolate chips and a dash more of each of the spices)
  • The meringue: Nothing special here (whip 3 egg whites and 1/3 c sugar to soft peaks, streaming in sugar as you go).
Tips for mini-baked-Alaskan success:
  • Cut out circles of cake and top with ice cream a day in advance (I used a 2.5" biscuit cutter and a medium ice cream scoop)
  • You'll want to turn your freezer to MAX POWER to freeze the ice cream as hard as possible overnight (remember you're going to be torching the thing, meringue insulation aside)
  • Wait until the next day to do the meringue - that way it won't develop condensation or deflate
  • Just before serving, slather the meringue on thickly (using a fork to give it lots of cool ridges and dimension)
  • Be fearless with the torch - you really want that nice toasted marshmallow look.


Monday, January 19, 2015

Happy new blog!

Hello, friends! Can you believe it's been six months? So much has happened (including a blog refresh)....

Stay tuned for good eats in 2015, but here's the year-end recap:
  1. Wedding! (in which there is cake)
  2. Nantucket mini-moon! (in which there are sunsets)
  3. Birthday! (in which my new husband makes me a birthday cake)
  4. Seattle visit! (in which my nephew discovers pizza)
  5. Annual New Hampshire trip! (in which the family gets out of the city)
  6. Friendsgiving! (in which there is a turkey AND a crudite turkey)
  7. Christmas with my family! (in which we visit the Big Apple)
  8. New year's with my in-laws! (in which there is much celebration)

Sunday, June 2, 2013

In the summer-thyme.


Summer is upon us! The temperature went above 90 for multiple days this week in Boston, to everyone's at-first-delight which quickly melted into chagrin. For those of you following the glorious return of Arrested Development, on a recent run I said, "I would give $30,000 for a glass of lemonade."

We've covered lemonade before, but this week I celebrated my first Summer Friday (thank, you employer!) of the year in a slightly more festive way. Adapting a refreshing cocktail from 101 Cookbooks, we toasted to summer with a crisp drink made of a few of my favorite things (a very Bev-"bev"). Try mixing things up with different flavored simple syrups, citrus fruit, and bubbly toppers. It was the perfect companion to a summer salad, bread, and cheese (in an attempt to stave off unnecessary stove heat).

(I squeezed four before giving up in the heat)


(a reused dried thyme jar)


*

Grapefruit-Thyme Sparklers
(Test different proportions to taste: we used about 2 oz gin, 3 oz grapefruit juice, 2 t simple syrup, and a splash of cava)

Thyme Simple Syrup:
1 c sugar
1 c water
1 bunch thyme

freshly squeezed and strained grapefruit juice
gin
sparkling wine (I used cava)

Make the simple syrup: bring sugar and water to a gentle boil. Add the thyme, turn off the heat, and let steep for 10-15 minutes. Strain and let cool.

Fill tall glasses 2/3 of the way with ice. Pour in the gin, juice, simple syrup, and top off with cava. Stir, sip, repeat.

Wednesday, January 2, 2013

Bring a torch.

 
Happy new year, everyone! I hope you all had a great holiday with friends and family.

I love citrus. Every morning in college, I had half a grapefruit with breakfast. I wore a citrus perfume for a couple years. I love Meyer lemons (the scent of my favorite hand soap), lemon in savory dishes, and a fat wedge of lime in my G&T. When my family went to Matsuhisa last year, I was properly introduced to yuzu, a delightful East Asian citrus fruit that has all the tangy-yet-sweet-ness that makes the corners of your mouth turn up with a zing. So enthusiastic were we about the yuzu juice that we convinced our waiter to give us a little spoonful to take home for the seafood dinner we planned to cook the next night.

This year for my dad's Christmas present (conveniently, when the fruit is in season), we ordered fresh yuzu online. My parents love fresh seafood, so we knew the yuzu would be put to good use. The fruit itself was totally unexpected -- about the size and shape of a slightly bumpy orange, the bright yellow sphere was so fragrant that I figured it would be bursting with juicy segments of fruit. On the contrary, once we cut open the fruit, it looked shriveled and chock full of seeds. We fortunately had come across a recipe that mentioned this, otherwise we probably would have thrown the first one (and perhaps another) out. To extract every bit of flavor, we zested the rind, squeezed some of the halves, and pureed the flesh of others to press through a sieve to extract the essential pulp.

"What else can we make?" my mom asked, brainstorming diverse and festive ways to use our yuzu. We settled on crème brûlée, which was exciting both because we had never made any before, and because we would finally need to buy a torch(!). The torch took some hunting around town, but we eventually found one, and it was worth the search.

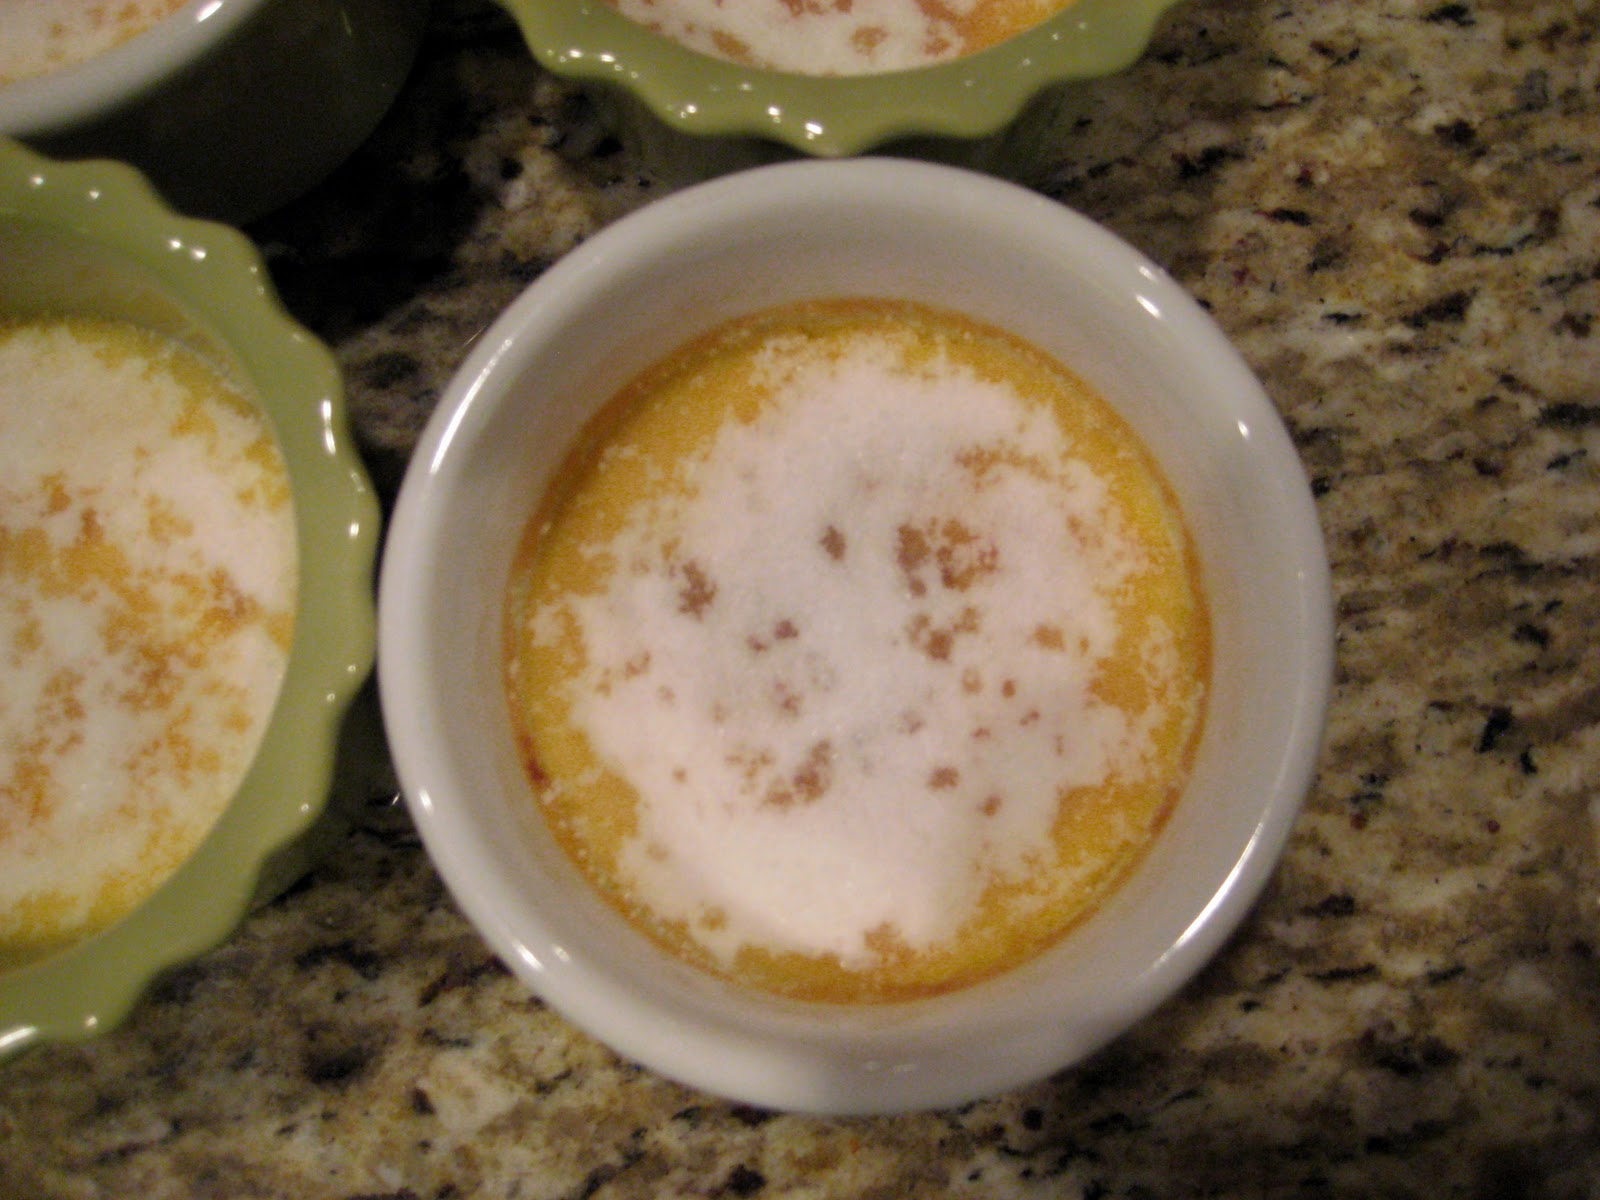
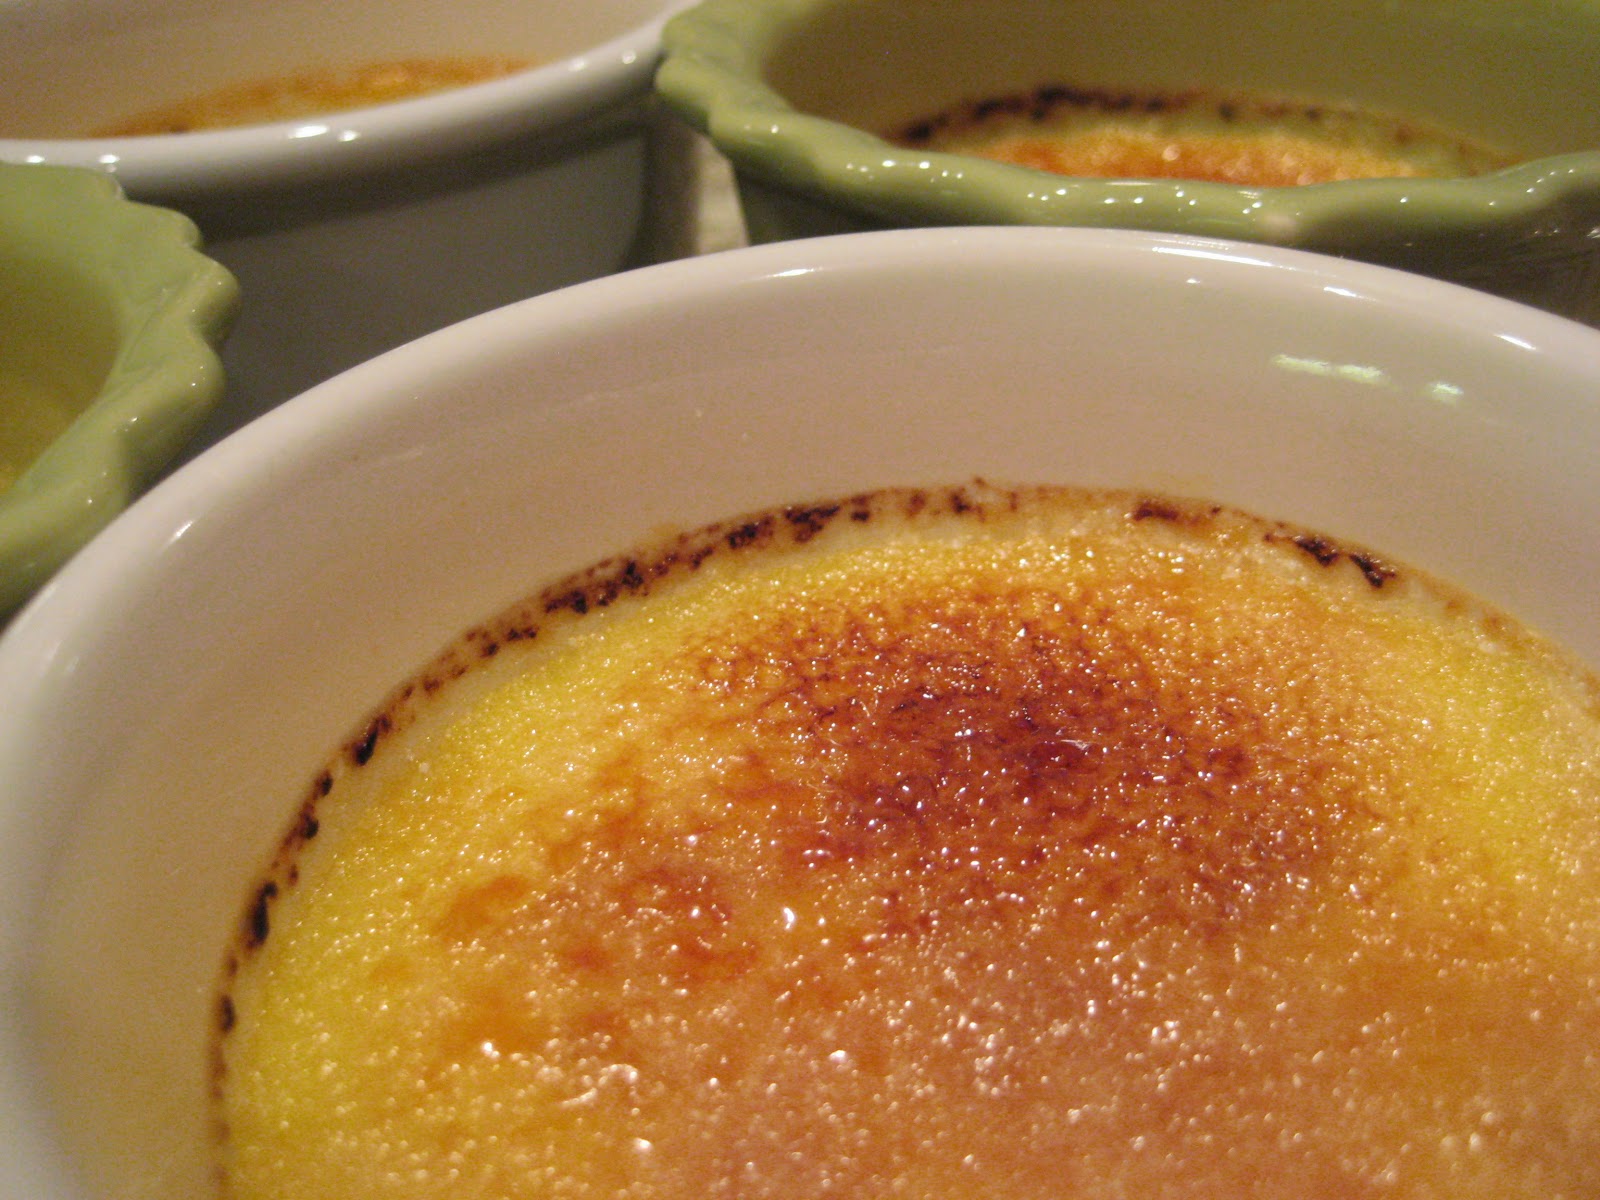
The result was exactly what we hoped for -- luxuriously creamy, slightly sweet but balanced, protected by a crystalline golden crust that made a satisfying tap tap tap when I broke the surface with my spoon. Brûlée first-timers, fear not! The recipe below was straightforward and successful. The perfect end to our Christmas dinner.

Tip: The torch flame will have two distinct blue "cones" (thanks, high school chemistry!) -- you want the very tip (HOT!) of the inner cone to reach the sugar surface for optimal caramelization.


*

Yuzu Crème Brûlée
from Tartlette Blog


For the custard:
6 egg yolks
1/2 c sugar
2 c heavy cream
zest of 3 yuzu
puree and juice of 3 yuzu (about 1/3 c combined juice and puree)

For the sugar crust:
1/4-1/2 c granulated sugar

In a large bowl, whisk together egg yolks and sugar until pale and thick (3-5 min). Meanwhile, place the cream in a saucepan over medium-high heat and bring to a simmer. Add the citrus mixture. It helps to have two people for this part: When the cream is hot (but not boiling), (person 1) slowly pour it over the reserved egg yolk mixture, (person 2) whisking constantly to prevent the yolks from curdling. Let cool to room temperature and refrigerate at least 4 hours, preferably overnight. (We were in a hurry and expedited the process by pouring the mixture into a flat glass dish to maximize cooling surface area, freezing the slightly cooled mixture for 30 min. before continuing to chill in the fridge for another hour or so.)

Preheat the oven to 350*F. Place six ramekins (depending on size) in a deep baking pan. Strain the mixture into a 3-4 cup measuring container (the spout makes pouring easier). Discard the yuzu. Pour into the ramekins until about 1/4-1/2" from the rim.

Place the baking pan in the oven and pour enough hot water to reach about halfway up the sides of the ramekins. Bake for about 20-25 min (longer if the ramekins are deeper, less time if they're shallow). Remove from the oven and let cool before removing the ramekins from the pan.

Refrigerate until completely cold. (Again, our freezer came in handy here.) When ready to serve, sprinkle each ramekin with 2-3 teaspoons of sugar and caramelize the tops with a blow torch.

Saturday, December 22, 2012

Freshly minted.

It's that time of year again! My annual baking frenzy has come and gone, and things are quieting down as everyone heads home for the holidays.

Last week I posted about some repurposed peppermint extract I used to spice up my hot chocolate -- its original intent was these little darlings:


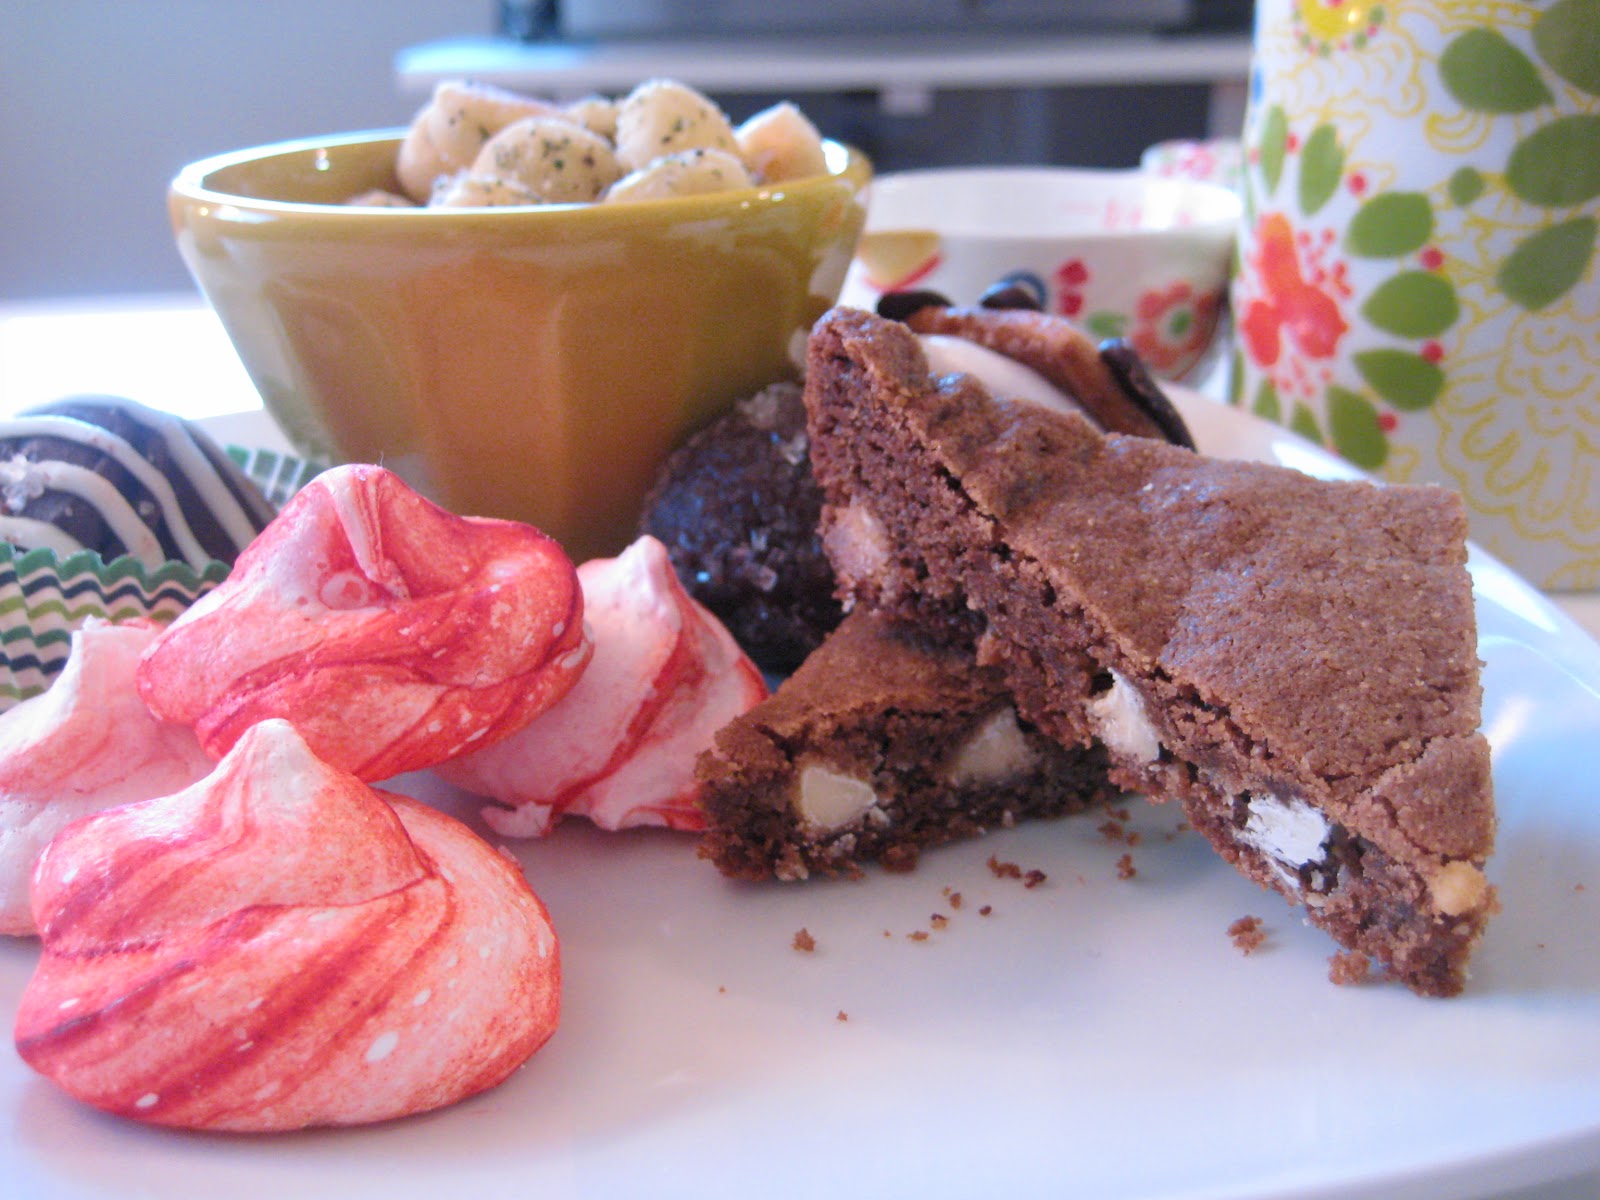
My magic Martha Stewart cookie book was the source for these light-as-air peppermint meringues. Instead of making the meringue sandwiches with ganache in between, I just made the meringues themselves. I try to make a variety every year -- some sweet, some savory, some chocolatey, some fruity, some refreshing and light. This year's line-up:
  • White chocolate chip gingerbread blondies
  • Ranch oyster crackers
  • Smoked paprika cashews
  • Lemon squares
  • (Back by popular demand) Grand Marnier truffles, s'more cookies, and rosemary cayenne cashews
These little peppermint meringues are so simple to make yet so festive and pretty. The trick is painting stripes of gel-paste food coloring into the pastry bag before piping them -- mine were not Martha Stewart-professional, as I lacked a large enough star tip to make the fancy edges (as well as the ambition to put together an actual pastry bag -- a gallon Ziploc bag works just great), but the red swirl was just what I was going for.

I was never a huge meringue gal, as I often find them to have a bit of a styrofoam texture, but these were surprisingly crisp and tasty (and diet-friendly!), adding some good variety to the mix.

*

Peppermint Meringues
(Makes 5-7 dozen meringues)

3 large egg whites
3/4 cup sugar
1/2 teaspoon pure peppermint extract
Red gel-paste food coloring

Preheat oven to 175°F. Line two baking sheets with parchment paper. Take a gallon Ziploc bag and cut off one of the corners, about 1/2" wide. Set aside.

Make meringues: Put egg whites and sugar in the heatproof bowl of an electric mixer. Set bowl over a pan of simmering water, and stir gently until sugar has dissolved and mixture is warm to the touch, 2-3 min.

Transfer bowl to an electric mixer fitted with the whisk attachment. Mix on medium-high speed until stiff peaks form. Mix in peppermint extract.

Using a new small paintbrush, paint 2 or 3 stripes of red food coloring inside the prepared bag. Fill bag with meringue. Pipe small (3/4"-high) drops onto prepared baking sheets.

Bake cookies until crisp but not brown, about 2 hr. (depending on your oven). Let cool completely on sheets on wire racks.

I found that leaving the pan in the oven (with the heat off) overnight helped the meringues get really crisp -- they can get chewy if they absorb moisture from the air/aren't 100% baked through.