Showing posts with label blogs. Show all posts

Wednesday, December 4, 2013

In food company.

I hope everyone had a wonderful Thanksgiving last week!

I don't know anyone who doesn't love eating...but it's always a special treat to get friends together who all love to cook too (as you may recall, my dearest friends in DC were dubbed "Potluck People"). A few weeks ago, five of us brought a favorite dish for a fall dinner party:

Jason's roast carrot salad: (I can't say I've ever featured carrots quite as magnificently as Jason's duo; the oven-roasted spices were a delightful, rich contrast to the tangy crème fraîche in both recipes)

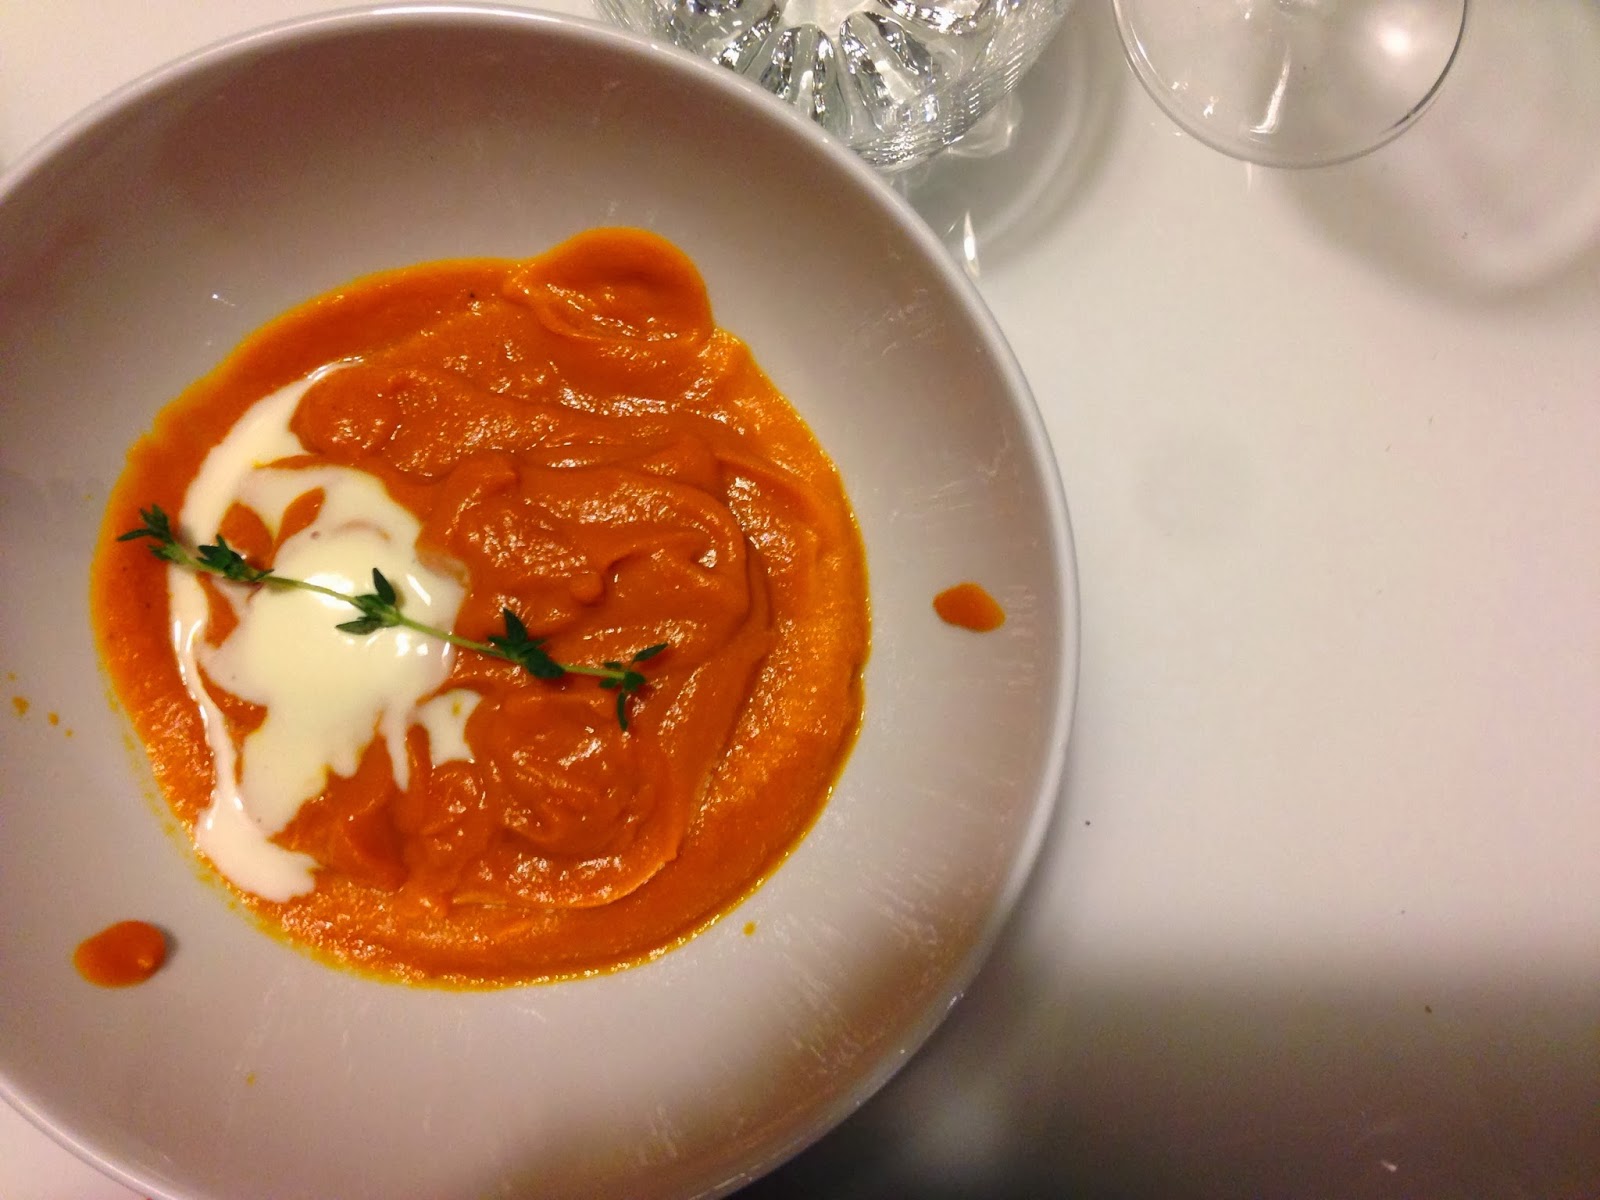
Followed by roast carrot soup: (Officially my favorite take on a velvety classic)
Lilly's Boeuf Bourguignon à la Julia Child: (Cozy and splendid for a cold fall evening - with that all-day chef's love-taste)

My mini chocolate mousse cakes: (Suzy McMullen meets mousse, ganâche, toasted hazelnuts, and raspberries)


I think the logistical key to any dinner party is being aware of how much time dishes need in the oven and/or on the stove top, as everything needs to be timed out (as opposed to a larger potluck-style gathering where dishes can come and go as their chef-owners). We each prepared components of the dishes at home and then assembled and plated at our gracious host and hostess's home.

I love large events such as Friendsgiving (more on that to come), but intimate dinner parties give us all a chance to sit down at a table and enjoy...and a good time was surely had by all.

P.S. - Food52 is a fabulous website-exchange-community-resource-center-marketplace that everyone should get to know.

*

Roasted Carrot Soup
(from Food52)

Serves 4

6 to 8 large carrots (about 1 3/4 lb.)
1/4 c olive oil
Salt
6 c low-sodium vegetable stock
1 inch-long piece ginger, peeled
1 sprig thyme, plus more for garnish
1/2 large sweet onion, chopped
2 large garlic cloves, chopped
Freshly ground black pepper

Peel and cut the carrots into 1/2" pieces. Toss carrots on a foil-lined baking sheet with 2 T of olive oil and sprinkle generously with salt. Set an oven rack 6-8" from the heat source and turn on the broiler. Broil carrots until they brown and soften, turning them with a spatula every 5 minutes or so; this should take 15-20 minutes.

Meanwhile, bring the stock to a boil and infuse with ginger and thyme by simmering gently for 15 minutes. Brown the onion over medium heat in a medium stock pot with the remaining olive oil, stirring frequently. Toast the garlic with the onion and oil, then add carrots. Remove the ginger and thyme from the stock and add the stock to the pot with the onions and carrots. Bring to boil and simmer for 5-10 minutes, until the carrots are soft enough to puree.

Use an immersion or a standard blender to puree the mixture until smooth. Adjust consistency if desired by adding more stock or water. Add salt and pepper to taste.


Carrot Avocado Salad
(from Food52)

2 lb. large carrots quartered and cut into 3" segments, peeled (about 4 c)
Kosher salt
1 orange
1 lemon
1 t cumin seeds
2 medium garlic cloves
1 T fresh thyme leaves
1/2 c extra-virgin olive oil
1 t red wine vinegar
1 t red pepper flakes
Freshly ground black pepper
1 T sugar
1 avocado, cut into 12 wedges
2 c mixed baby sprouts, herbs, and microgreens
1/4 c crème fraîche
2 T toasted sunflower seeds
2 t toasted sesame seeds

Adjust an oven rack to the center position and preheat the oven to 450*F. Place carrots in a saucepan and cover them with cold water. Season with salt, set over high heat, and bring to a simmer. Reduce the heat to medium and simmer until tender, about 10 minutes. Drain the carrots and transfer them to a medium bowl.

Cut the orange and lemon in half and juice half of each one, reserving the juice and the remaining halves. Combine cumin, garlic, thyme, 2 T olive oil, the red wine vinegar, red pepper, 1 t orange juice, and 1 t lemon juice in a blender until smooth. Season the marinade to taste with salt and pepper. Add the marinade and the unjuiced citrus halves to the carrots and toss to combine. Spread the carrots and citrus halves on a rimmed baking sheet and bake until the carrots are slightly shriveled with a few brown spots, about 20 minutes. Allow the carrots to cool to room temperature.

Meanwhile squeeze the juice from the roasted citrus halves into a small bowl. Add the remaining fresh orange juice, lemon juice, remaining 6 T olive oil, and sugar. Season the dressing to taste with salt and pepper, and whisk to combine. Divide the carrots and avocado slices onto four plates. Divide the greens among the plates on top of the carrots and avocado. Add a tablespoon of crème fraiche to each salad. Sprinkle sunflower seeds and sesame seeds over each plate. Drizzle dressing over and around each salad (reserve any remaining dressing for another use), and serve immediately.

Monday, September 16, 2013

Millions of peaches.


I think we may have made an official tradition: fruit picking on my birthday weekend. This year was extra special, with a trip to my first peach grove. I won't further belabor the point about how much I love peaches, but I was in stone fruit heaven.


Ward's Berry Farm is a fabulous farm whose bins overflow with enormous pumpkins, fat butternut squashes, perfectly sour Concord grapes, and, of course, jewel-like berries. We got lucky: the weather was gorgeous, we had a very nice (unofficial) tour guide, and I think we picked the very last of all of New England's peaches. Our guide walked us through the back areas of the operation, tossing plump cherry tomatoes at us and cutting off pieces of ripe fruit with a pocket knife. He showed us what we were looking for in a ripe peach:
  • barely firm fruit that "gives" with a (very) slight squeeze
  • a warm, fuzzy, sun-warmed fragrance
  • and the most important thing -- in addition to a nice rosy blush, a sunny yellow undertone. (Even if a greenish-yellow foundation is blooming red, it might just be pretending, as the redness is attributed to exposure to the sun...only part of the ripening process.)
Our friend advised us that we would find some of the best peaches on the ground -- just brush off the (dry) soil, and voila. Occasionally we would have to fight Nature for a really good-looking one, but sometimes we would also get lucky and hear the soft thud of a just-ripe peach before it had been claimed. We also found plenty on the tree after all, but it was quite different from other fruit-picking experiences I've had.

We did a pretty good job. (Don't worry, these aren't all mine.)

We threw a few on the grill with our fellow peach-pickers: ("marinated" first)


And I whipped up a batch of brown-butter peach scones when I got home. The scones were a little more like a quick bread than a scone (I prefer my scones with a good crust all around), but they were delicious nonetheless. Big sugar crystals on top give a nice crunch.

*

Brown-Butter Peach Scones
from AskChefDennis.com and Tutti Dolci

Makes 2 dozen

10 T unsalted butter
4 c all-purpose flour
2/3 c sugar
4 t baking powder
1 t baking soda
1/2 t salt
1/2 t cinnamon
2 c diced peaches
1 1/3 c low-fat buttermilk
2 large eggs
1 t vanilla extract
1 T turbinado sugar

Melt butter in a heavy saucepan over medium heat, stirring constantly until it foams, turns clear, and then turns a deep brown, about 6 min. Pour browned butter into a glass dish and chill in the freezer until solid and chilled, about 1½ hr.

Preheat oven to 400*F and line a baking sheet with parchment paper. Whisk together flour, sugar, baking powder, baking soda, salt, and cinnamon in a large bowl.

Dice chilled brown butter into small pieces; sprinkle over flour mixture and use a pastry cutter to cut in evenly until mixture resembles coarse meal. Dry peaches between layers of paper towels; add to flour mixture, folding in gently.

Whisk together buttermilk, egg, and vanilla extract in a small bowl; add to flour mixture and fold in just until incorporated. Use a floured bench scraper (or rubber spatula) to scrape dough out onto prepared baking sheet; generously flour hands and pat dough into an 1.5" thick round.

Score deeply into 24-48 pieces (depending on what size you want) with a knife; sprinkle dough with turbinado sugar. Bake 20-25 min., or until golden. Cool 2 min. on baking sheet, then carefully transfer to wire rack to cool before cutting completely.

Saturday, July 13, 2013

Banana nut crunkcakes.

When I lived in DC, I discovered a wonderful mobile bakery called Crunkcakes. Not having a store front of their own, you could find these boozy morsels on trays in various bakeries, bars, and other establishments around the city, as well as at street festivals. I became hooked on their Irish Car Bomb cupcakes, which are a mainstay at the Pug, the bar below my beloved ramen place where I traditionally waited out the 45 minute-1.5 hour line for a seat upstairs.

As I mentioned earlier this month, our office has had a little trouble eating through the banana portion of our weekly fruit delivery. I brought home another bunch and this time went a sweeter route -- inspired by nostalgia, I decided to spice(d rum) up the next round of banana-themed baked goods.

The cupcakes ended up being several relatively simple components all combined into one bite -- as a result, these are a project best tackled over a number of days. No part was particularly difficult or time-consuming, but taken on all together, it would be quite the culinary marathon.

Banana Cake + Bananas Foster + Spiced Rum Caramel + Buttercream Frosting = Bananas Foster Cupcakes

The banana cake:

The bananas Foster:


The spiced rum caramel:


Assembly:
Use a small, round cookie cutter and a spoon to remove a tiny hollow from the center of each cupcake.

Fill each hollow with a spoonful of bananas Foster.

Cover with a generous swirl of frosting mixed with caramel sauce; you can mix in as much as you want and as completely as you want. I used about 1/4 c of the caramel sauce and didn't mix completely for a swirl effect.

*
Recipes here make 2 dozen cupcakes

Bananas Foster - Adapted to Fill Cupcakes
(adapted from allrecipes.com)

2 T butter
1/3 c dark brown sugar
3 T rum
1 t vanilla extract
1/2 t ground cinnamon
1 banana, peeled and diced into small pieces
pinch salt
1/4 c chopped walnuts, toasted

Melt butter and brown sugar in a small skillet over medium heat. Add rum, vanilla extract, and cinnamon.When mixture begins to bubble, add bananas to the pan. Cook until soft, for about 2-3 min. Remove from heat and add salt and walnuts; stir to combine.

Banana Cupcakes
(adapted from The Butter Dish blog - doesn't that sound like something I'd like?)

1 7/8 c unbleached all-purpose flour
2 1/4 t baking powder
3/4 t baking soda
1/2 t salt
2 ripe bananas, mashed
3/4 c heavy cream
2 1/4 t pure vanilla extract
1 c sugar
3/4 c unsalted butter, room temperature
2 eggs

Heat oven to 350* F and line muffin tin with cupcake liners. Whisk flour, salt, baking soda and baking powder in a medium bowl. In separate bowl combine the bananas, cream and vanilla. Beat butter with sugar until light and fluffy. Add one egg at a time and blend until well combined.

In three alternating additions add flour and banana mixture. Divide mixture evenly between muffin cups and bake for 20 minutes. Allow to cool completely before attempting to fill.

Spiced Rum Caramel
(also from The Butter Dish blog)

1 c dark brown sugar
½ c corn syrup
½ c unsalted butter
1 c heavy cream
1 t vanilla extract

1 c spiced rum

In a medium pan (NOT nonstick - must be fire-proof) combine sugar, corn syrup, butter and half the cream and heat to a roiling boil for 9 min. Then add remaining cream and allow to boil for 1 min. longer. Add vanilla and rum, continuing to boil for 1 min. Using a long lighter, light the sauce on fire (!) and boil until flames burn out. You may have to stir with a spoon and light again, repeating a couple times until the sauce doesn't light. Reduce heat and simmer until sauce has reduced and thickened (another 5 min. or so, depending on how big your pan is). Once thickened some more, set sauce aside and allow to cool. Once cool, transfer pan to fridge and allow to chill completely and thicken.

Buttercream Frosting

2 c shortening or butter
4 c sifted confectioner's sugar
4 t vanilla
4 T water
pinch salt

Cream shortening or butter, gradually adding confectioner's sugar, about 1 c at a time. Add vanilla, water, and salt, and adjust to taste. Add more water if you want a thinner frosting, more sugar if you want a stiffer batch.

Sunday, June 2, 2013

In the summer-thyme.


Summer is upon us! The temperature went above 90 for multiple days this week in Boston, to everyone's at-first-delight which quickly melted into chagrin. For those of you following the glorious return of Arrested Development, on a recent run I said, "I would give $30,000 for a glass of lemonade."

We've covered lemonade before, but this week I celebrated my first Summer Friday (thank, you employer!) of the year in a slightly more festive way. Adapting a refreshing cocktail from 101 Cookbooks, we toasted to summer with a crisp drink made of a few of my favorite things (a very Bev-"bev"). Try mixing things up with different flavored simple syrups, citrus fruit, and bubbly toppers. It was the perfect companion to a summer salad, bread, and cheese (in an attempt to stave off unnecessary stove heat).

(I squeezed four before giving up in the heat)


(a reused dried thyme jar)


*

Grapefruit-Thyme Sparklers
(Test different proportions to taste: we used about 2 oz gin, 3 oz grapefruit juice, 2 t simple syrup, and a splash of cava)

Thyme Simple Syrup:
1 c sugar
1 c water
1 bunch thyme

freshly squeezed and strained grapefruit juice
gin
sparkling wine (I used cava)

Make the simple syrup: bring sugar and water to a gentle boil. Add the thyme, turn off the heat, and let steep for 10-15 minutes. Strain and let cool.

Fill tall glasses 2/3 of the way with ice. Pour in the gin, juice, simple syrup, and top off with cava. Stir, sip, repeat.

Wednesday, January 2, 2013

Bring a torch.

 
Happy new year, everyone! I hope you all had a great holiday with friends and family.

I love citrus. Every morning in college, I had half a grapefruit with breakfast. I wore a citrus perfume for a couple years. I love Meyer lemons (the scent of my favorite hand soap), lemon in savory dishes, and a fat wedge of lime in my G&T. When my family went to Matsuhisa last year, I was properly introduced to yuzu, a delightful East Asian citrus fruit that has all the tangy-yet-sweet-ness that makes the corners of your mouth turn up with a zing. So enthusiastic were we about the yuzu juice that we convinced our waiter to give us a little spoonful to take home for the seafood dinner we planned to cook the next night.

This year for my dad's Christmas present (conveniently, when the fruit is in season), we ordered fresh yuzu online. My parents love fresh seafood, so we knew the yuzu would be put to good use. The fruit itself was totally unexpected -- about the size and shape of a slightly bumpy orange, the bright yellow sphere was so fragrant that I figured it would be bursting with juicy segments of fruit. On the contrary, once we cut open the fruit, it looked shriveled and chock full of seeds. We fortunately had come across a recipe that mentioned this, otherwise we probably would have thrown the first one (and perhaps another) out. To extract every bit of flavor, we zested the rind, squeezed some of the halves, and pureed the flesh of others to press through a sieve to extract the essential pulp.

"What else can we make?" my mom asked, brainstorming diverse and festive ways to use our yuzu. We settled on crème brûlée, which was exciting both because we had never made any before, and because we would finally need to buy a torch(!). The torch took some hunting around town, but we eventually found one, and it was worth the search.

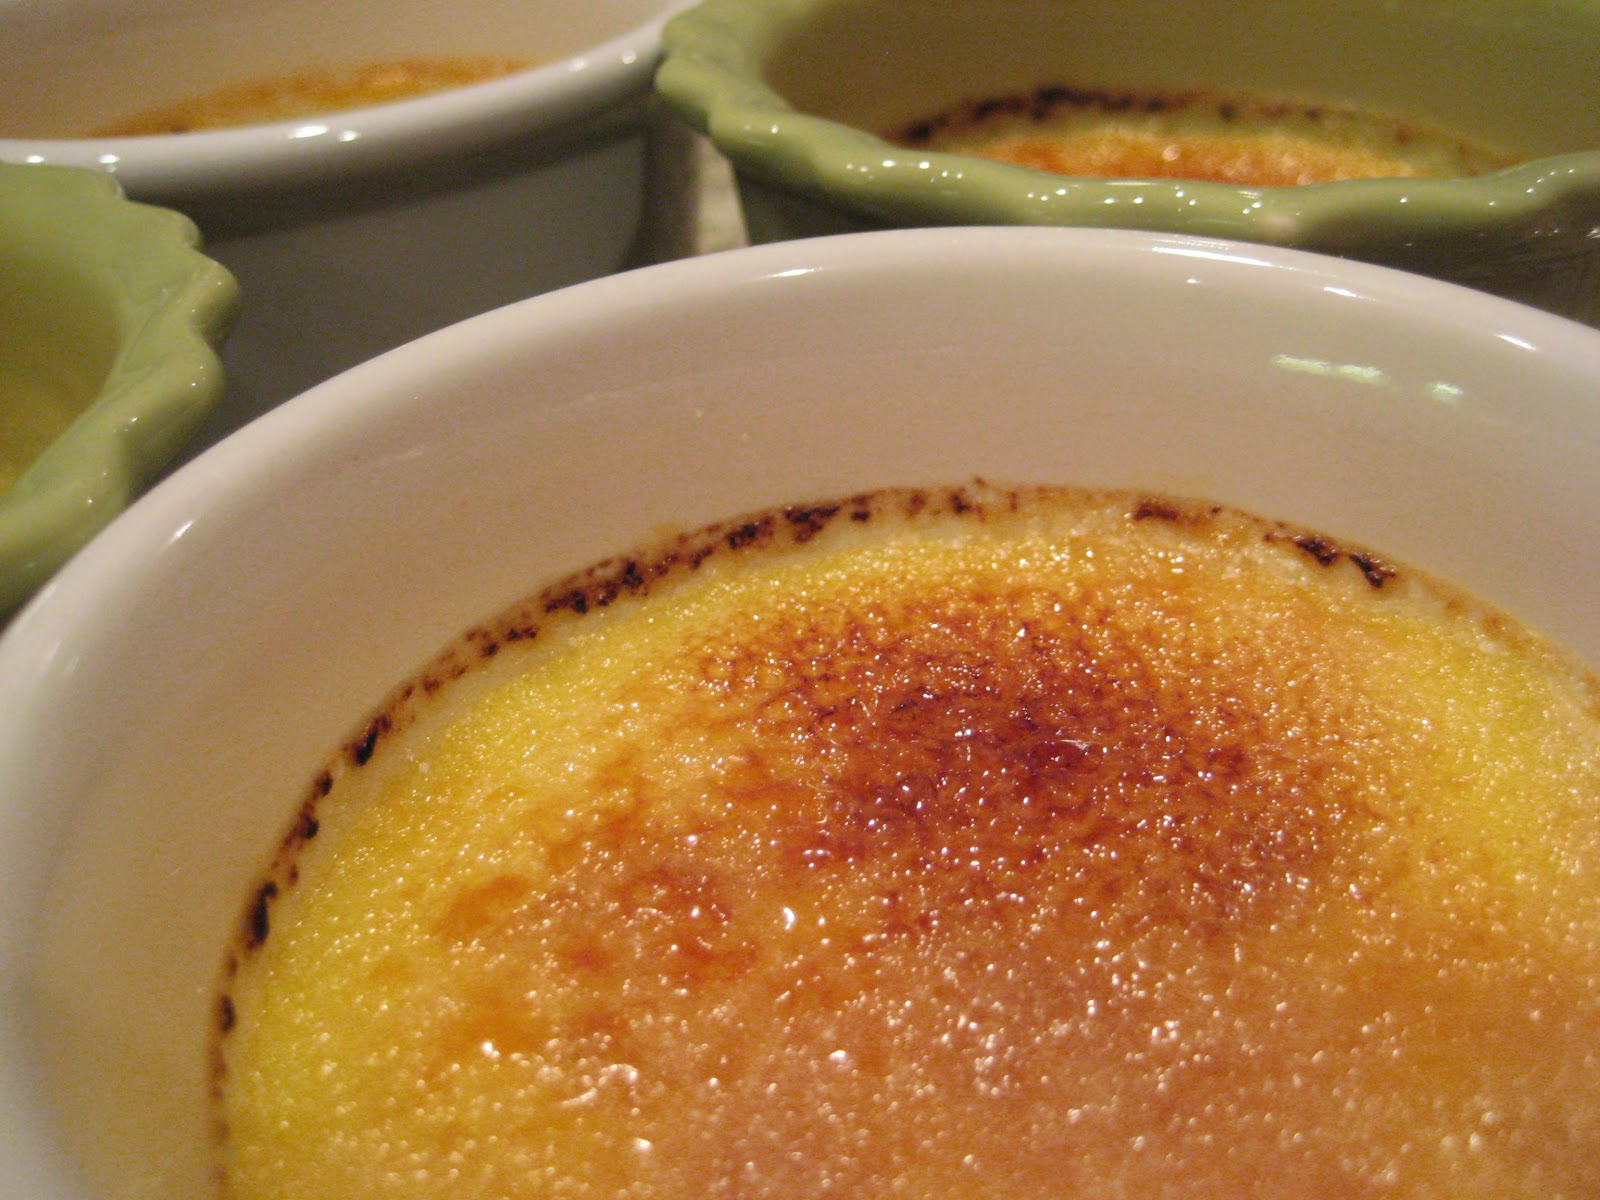
The result was exactly what we hoped for -- luxuriously creamy, slightly sweet but balanced, protected by a crystalline golden crust that made a satisfying tap tap tap when I broke the surface with my spoon. Brûlée first-timers, fear not! The recipe below was straightforward and successful. The perfect end to our Christmas dinner.

Tip: The torch flame will have two distinct blue "cones" (thanks, high school chemistry!) -- you want the very tip (HOT!) of the inner cone to reach the sugar surface for optimal caramelization.


*

Yuzu Crème Brûlée
from Tartlette Blog


For the custard:
6 egg yolks
1/2 c sugar
2 c heavy cream
zest of 3 yuzu
puree and juice of 3 yuzu (about 1/3 c combined juice and puree)

For the sugar crust:
1/4-1/2 c granulated sugar

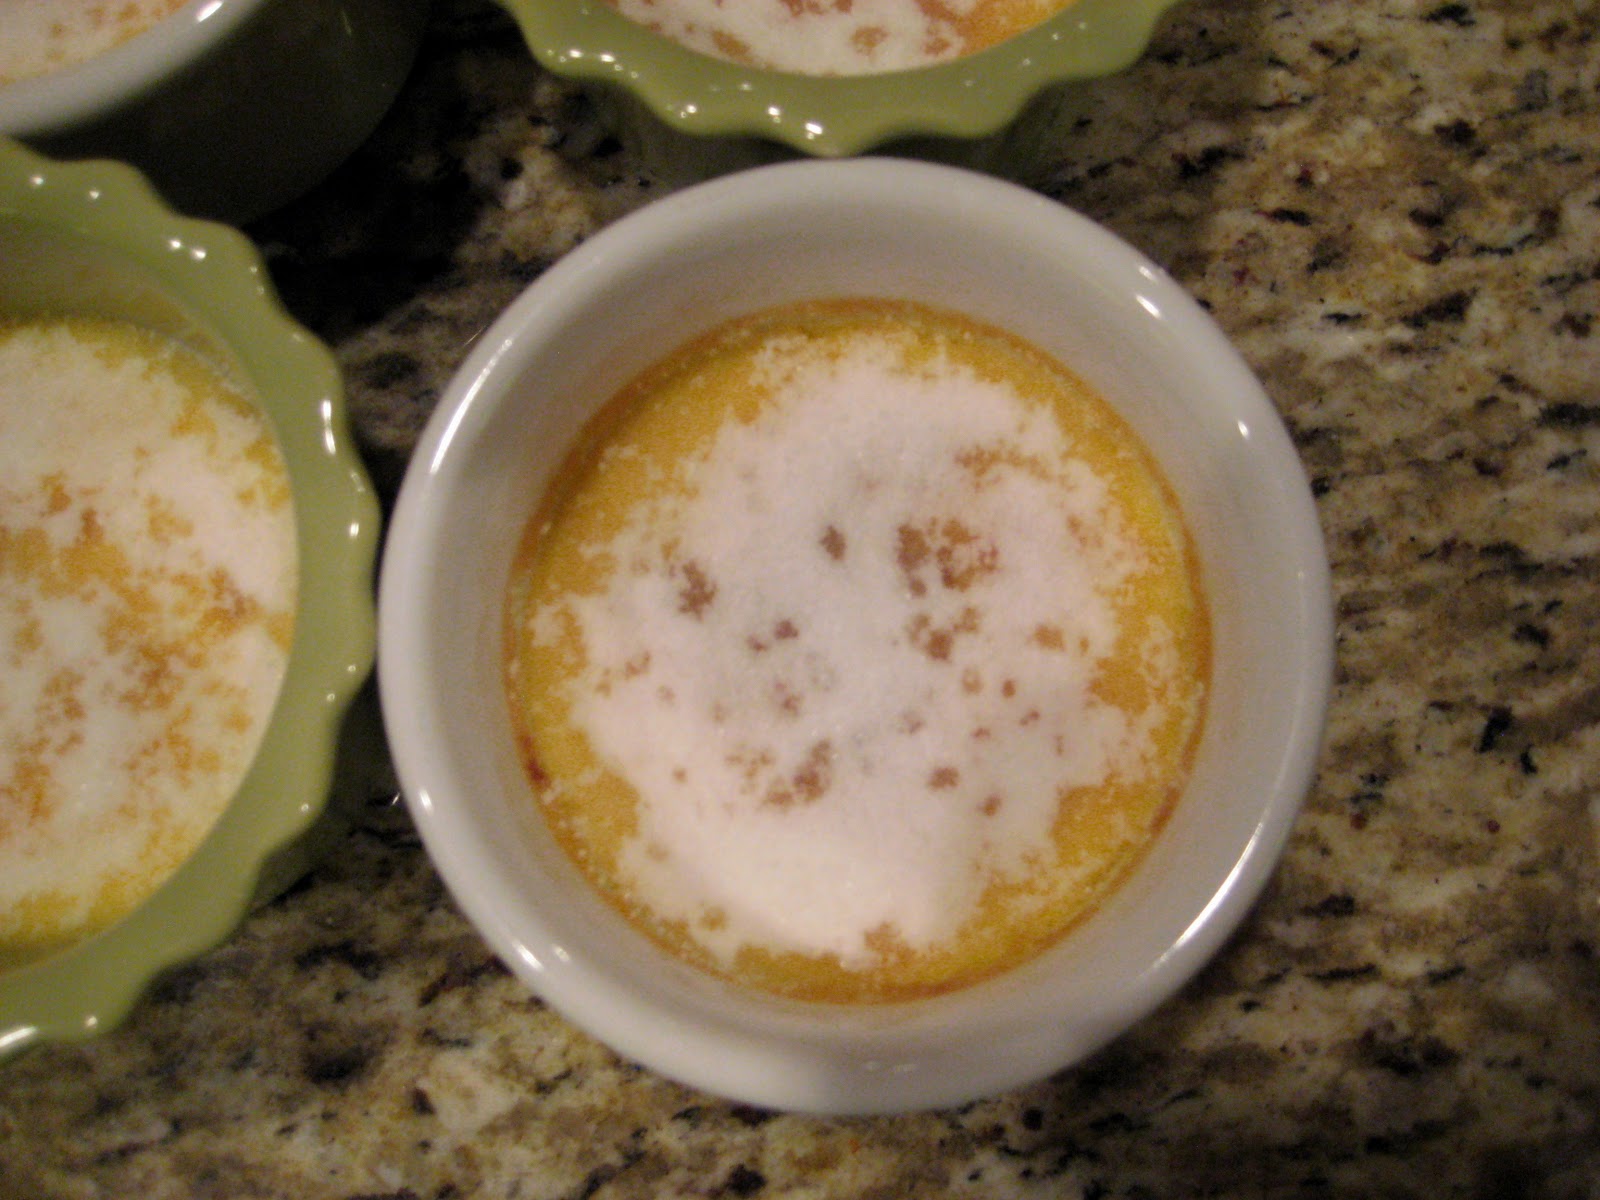
In a large bowl, whisk together egg yolks and sugar until pale and thick (3-5 min). Meanwhile, place the cream in a saucepan over medium-high heat and bring to a simmer. Add the citrus mixture. It helps to have two people for this part: When the cream is hot (but not boiling), (person 1) slowly pour it over the reserved egg yolk mixture, (person 2) whisking constantly to prevent the yolks from curdling. Let cool to room temperature and refrigerate at least 4 hours, preferably overnight. (We were in a hurry and expedited the process by pouring the mixture into a flat glass dish to maximize cooling surface area, freezing the slightly cooled mixture for 30 min. before continuing to chill in the fridge for another hour or so.)

Preheat the oven to 350*F. Place six ramekins (depending on size) in a deep baking pan. Strain the mixture into a 3-4 cup measuring container (the spout makes pouring easier). Discard the yuzu. Pour into the ramekins until about 1/4-1/2" from the rim.

Place the baking pan in the oven and pour enough hot water to reach about halfway up the sides of the ramekins. Bake for about 20-25 min (longer if the ramekins are deeper, less time if they're shallow). Remove from the oven and let cool before removing the ramekins from the pan.

Refrigerate until completely cold. (Again, our freezer came in handy here.) When ready to serve, sprinkle each ramekin with 2-3 teaspoons of sugar and caramelize the tops with a blow torch.

Thursday, June 7, 2012

Surprise center.

I may cook with a lot of butter (and by now my readers know I'm not shy when it comes to dessert). My cooking and nutrition philosophy revolves more around balancing the "good" and "bad," focusing on flavor and variety, and eating real, natural food.

Few know more about natural food than Heidi Swanson, the culinary genius behind the blog, 101Cookbooks, and a 2012 James Beard winner. Her new book, Super Natural Every Day, is filled with healthful, delicious recipes using all-natural ingredients. The beautiful photography and writing inspire even the most white-flour chefs among us to try her recipes.

Her post about Sesame Almond Brown Rice Balls was so cute that I immediately searched high and low for black sesame seeds (not an integral part of the dish by any means, but a cute addition I had to have). Specialty food store after supermarket failed me, and I was only rescued by my mom bringing me a little pouch of black sesame seeds from home on one of our whirlwind-weekend New York trips.

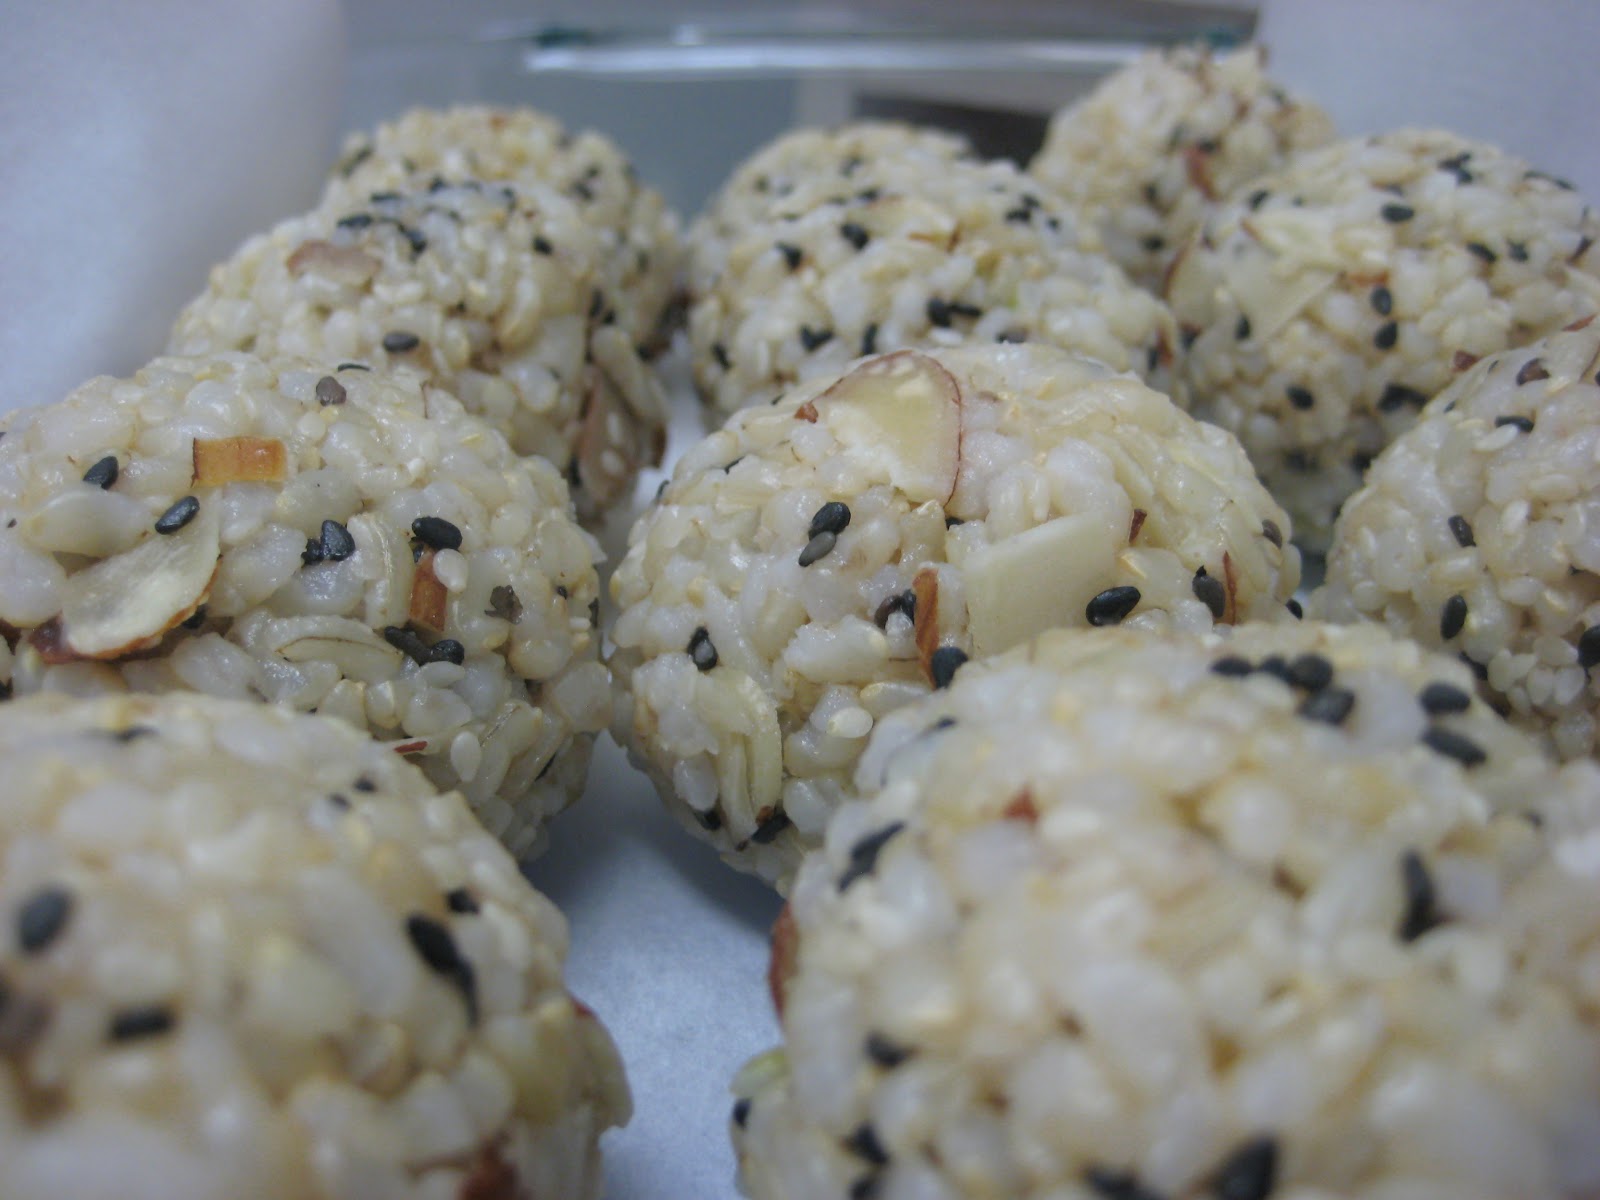
Sesame seeds in hand, I made the rice and started rolling. As Heidi says, you can put pretty much anything in the center of these little munchkins. I chose avocado for one batch and marinated cubes of tofu for the other. (See? Her recipes inspire me to use tofu.) In the end, they hand-rolling wasn't quite as tedious as I feared they would be, and they tasted even better after a couple days in the refrigerator.


Two tips: I would try to minimize the amount of rice for each ball while still covering the secret center, as they were quite filling. Also, take care with the seasoning -- you don't want to put too much salt in the ball itself because the dipping soy sauce will be quite salty. Do give the avocado a dash of salt when you're tossing it with the lemon, though, since it takes a while for the soy to hit the center when eating them. I ate two or three of these at a time with some Chinese vegetables in soup, which made for a light and delicious meal.

*

Sesame Almond Brown Rice Balls
(101 Cookbooks)
Makes 2 dozen

2 c (when measured raw) brown sushi rice, cooked (I used a rice cooker, and it worked perfectly)
3 c water
1/2 t sea salt

1/4 c sesame seeds (white/black mix)
3 T toasted almond slices/slivers, chopped
1/4 c minced green onions

In the center: avocado cubes tossed in lemon juice and salt; tofu marinated in my "Hero" sauce

After rice is cooked, remove from heat/unplug the rice cooker and let rest, covered, for at least 15 minutes, preferably a bit longer. Fluff with a fork, then gradually add and incorporate the sesame seeds, almonds, and green onions. Taste and adjust seasoning, adding more salt if needed. Let the rice cool quite a bit before shaping.

To form the rice balls, line a small cup/ramekin with plastic wrap, then fill with 1 1/2 - 2 T of the rice mixture. Place your "surprise center" in the middle, then gather the plastic wrap at the top and twist to seal the center inside the rice ball. Using your other palm, shape the rice into a ball. Carefully remove plastic wrap and set the rice ball in a parchment lined container or on a plate. Repeat with the remaining rice. Serve with a dish of soy sauce.

Heidi's tips: If your fingers get sticky, dab with water. And if you run out of steam making rice balls, just cook up a couple eggs into a thin omelette, cut into shreds, and toss with the rice.


Tuesday, June 5, 2012

Not your average pasta salad.

I recently celebrated a friend's birthday dinner at Floriana in Dupont Circle. As you may remember, our little group rarely dines Italian -- she picked the restaurant for its rustic-yet-elegant vibe, and we couldn't have asked for better atmosphere on the patio that evening: it was one of those perfect late spring D.C. nights where the sun was just setting so the air was still warm, but the summer humidity was still at bay.

As much as I enjoyed the dinner special which half the table ordered (fontina-stuffed meatballs in a fresh pomodoro sauce over pasta), our complimentary birthday desserts, and the fizzy prosecco cocktails, my favorite dish was a truly simple salad: arugula tossed with lemon and olive oil, with shaved Parmesan. The spicy bite of arugula and creamy cheese (with my favorite little salt crystals) balanced perfectly with the bright lemon. I love arugula as a green because it has body and flavor on its own. It stands up in salads but also wilts beautifully over pasta or pizza.

A few weeks later, D.C. has hit full-blown summer heat and humidity. Feeling too hot and lazy to fire up the stove for heavy-duty cooking, I decided to make a pasta dinner inspired by my refreshing salad from Floriana. Fortunately, Smitten Kitchen had a great recipe seemingly tailor-made for the occasion. The cream, cheese, and olive oil did their smoothing act on the spiky arugula and citrus flavors, just as I had remembered.

*
Spaghetti al Limone
(Adapted from Smitten Kitchen)
Serves 2

1/3 lb spaghetti
Salt
2 lemons (depending on the size of your lemons - add to taste, 1 T at a time)
2 T extra virgin olive oil (I added a dash of lemon-infused olive oil for a boost)
2-3 T heavy cream
1 oz finely grated Parmesan cheese (about 1/2 c), plus additional for serving
Ground black pepper
Generous handful arugula
Cook pasta in well-salted water until al dente. While pasta is cooking, zest and juice both lemons — you’ll have about 2 T of zest and anywhere from 1/3 to 1/2 c lemon juice.

Drain pasta, reserving 1/2 c of the cooking water. Dry out your pot, then boil the olive oil, cream, zest and 1/4 c of the reserved pasta water together for two minutes over high heat. Return pasta to pot and stir until coated. Add the cheese and lemon juice and toss well. Add more pasta water, a drizzle at a time, if you’d like your dish a little looser. Stir in arugula and season generously with salt and pepper.

Serve immediately -- this isn't one for leftovers.

Sunday, January 8, 2012

Seasons (gr)eatings.

When I was little, the approaching holidays always meant one afternoon of breaking out the cookie cutters, rolling pins, and sheet trays to make our stand-by Christmas treat: sugar cookies. My mom had this recipe from an old magazine that we used year after year, making chocolate and nut-covered logs, Christmas tree-shaped cutouts decorated with colorful ice cream toppings as ornaments, snowmen with chocolate-dipped top hats, angels, bells, stars, and teddy bears (that always took on a slightly frightening look because we used mini M&Ms for eyes that looked unnaturally large compared to the rest of the body -- I remember a particularly scary blue-eyed bear one year). My mom also made Swedish tea log, lemon squares, almond crescents, rum balls, and peppermint bark. We (or rather, she) would wrap them all up in colorful paper or cellophane bags and give them as gifts to friends, neighbors, bus drivers, homeroom teachers, music teachers, and coaches. (We would keep the other six dozen or so in tins that lasted until my mom would give up and freeze them sometime around February.) Over the years, our tastes matured away from our old sugar cookies, but I still find myself missing the making and decorating of cookies while drinking hot chocolate from my perch on a kitchen chair.

The first Christmas I lived alone, I was feeling nostalgic and decided to make treats of my own to send to friends and to bring to the office (I have a slightly less personal relationship with DC bus drivers than the one who picked me up and dropped me off every day for four years of middle school). You could say I've continued the tradition on my own over the years, taking an early-December trip to the Container Store (my Mecca) to pick out tins, boxes, cellophane bags, and ribbon to package my goodies, and then spend a weekend baking and assembling packages to deliver and mail.

This year's boxes contained some familiar items: my mom's lemon squares, a modified rum ball, chocolate bark, and a few other items including mini versions of my Halloween Snickers cookies (back by popular demand). From the reviews, it was another successful year (aided significantly by the arrival of my new mixer, without which the homemade marshmallow would not have been possible).

Homemade graham crackers (surprisingly easy to make and surprisingly faithful to the original taste) for "S'more" cookies:

...Sandwiched with homemade marshmallow and drizzled with chocolate: 

Rum ball remix, three ways: 1) creme de cacao, 2) Grand Marnier, or 3) brandy, dipped in chocolate: 

Dark chocolate bark with toasted almonds and fleur de sel, inspired by these Ghirardelli morsels: 

Every year I get a little anxious -- that the chocolate won't set, the booze will ooze, the cookies will all shatter by the time they arrive at their destinations (I learned the hard way the virtues of careful packaging). But the phone calls and e-mails I get upon receipt reassure me they've arrived in one piece, as well as remind me of the reason my mom did it/why I do it today: to spread holiday cheer and thank the people we're grateful to have in our lives.