Showing posts with label recipes. Show all posts

Sunday, July 8, 2018

Some good ombre.

Week 29! Time is flying by. I'm happy to report that our list of pre-Bun to-dos is quickly shrinking, seemingly directly proportionally to the speed of my growing belly (I can't see my feet anymore when I look down). Making up for lost time in the first few months, I've been cooking and baking up a storm. Most recently, Nick's whole family visited a few weeks ago -- the Bev and Breakfast was at full occupancy -- and we celebrated not one, not two, but three June birthdays. With ambition I'll only ever be able to achieve fueled by pregnancy hormones, I made three birthday cakes...well, two cakes and a batch of cupcakes. Two recipes I have down pretty well by now:
  • For Nick -- upon request -- the London Fog chocolate cake with Earl Grey-vanilla buttercream and salted caramel made another appearance:
  • For one sister-in-law, I made a batch of lemon cupcakes with fresh blackberry buttercream:

For my other sister-in-law, I tried something new. She 1) tends not to love super-sweet/thick frosting (happy to play clean-up crew anytime), 2) loves coffee, 3) was about to head off for a fabulous Eurotrip and 4) for a few years has had balayage highlights which create an awesome ombre effect in her long, brown hair. Add the inspiration together, and I give you ombre tiramisu cake:
  

I've had this amazing cake book (as delicious to look at as to eat from) for a while now, and often what I find makes her cakes so stunning is that the author actually makes small-diameter, sky-high stacked cakes. The easiest way to achieve that is using a bunch of smaller pans, so this was the perfect opportunity to buy four, six-inch rounds (what's a house in the suburbs for, if not to have storage for a growing collection of cake pans?). I ultimately used a different recipe than one in the book to achieve a more "pure" tiramisu and ombre effect, and for my first time making it, I was quite pleased with how it came out.

These little cuties made four tiny layers: one vanilla, two coffee and one chocolate:
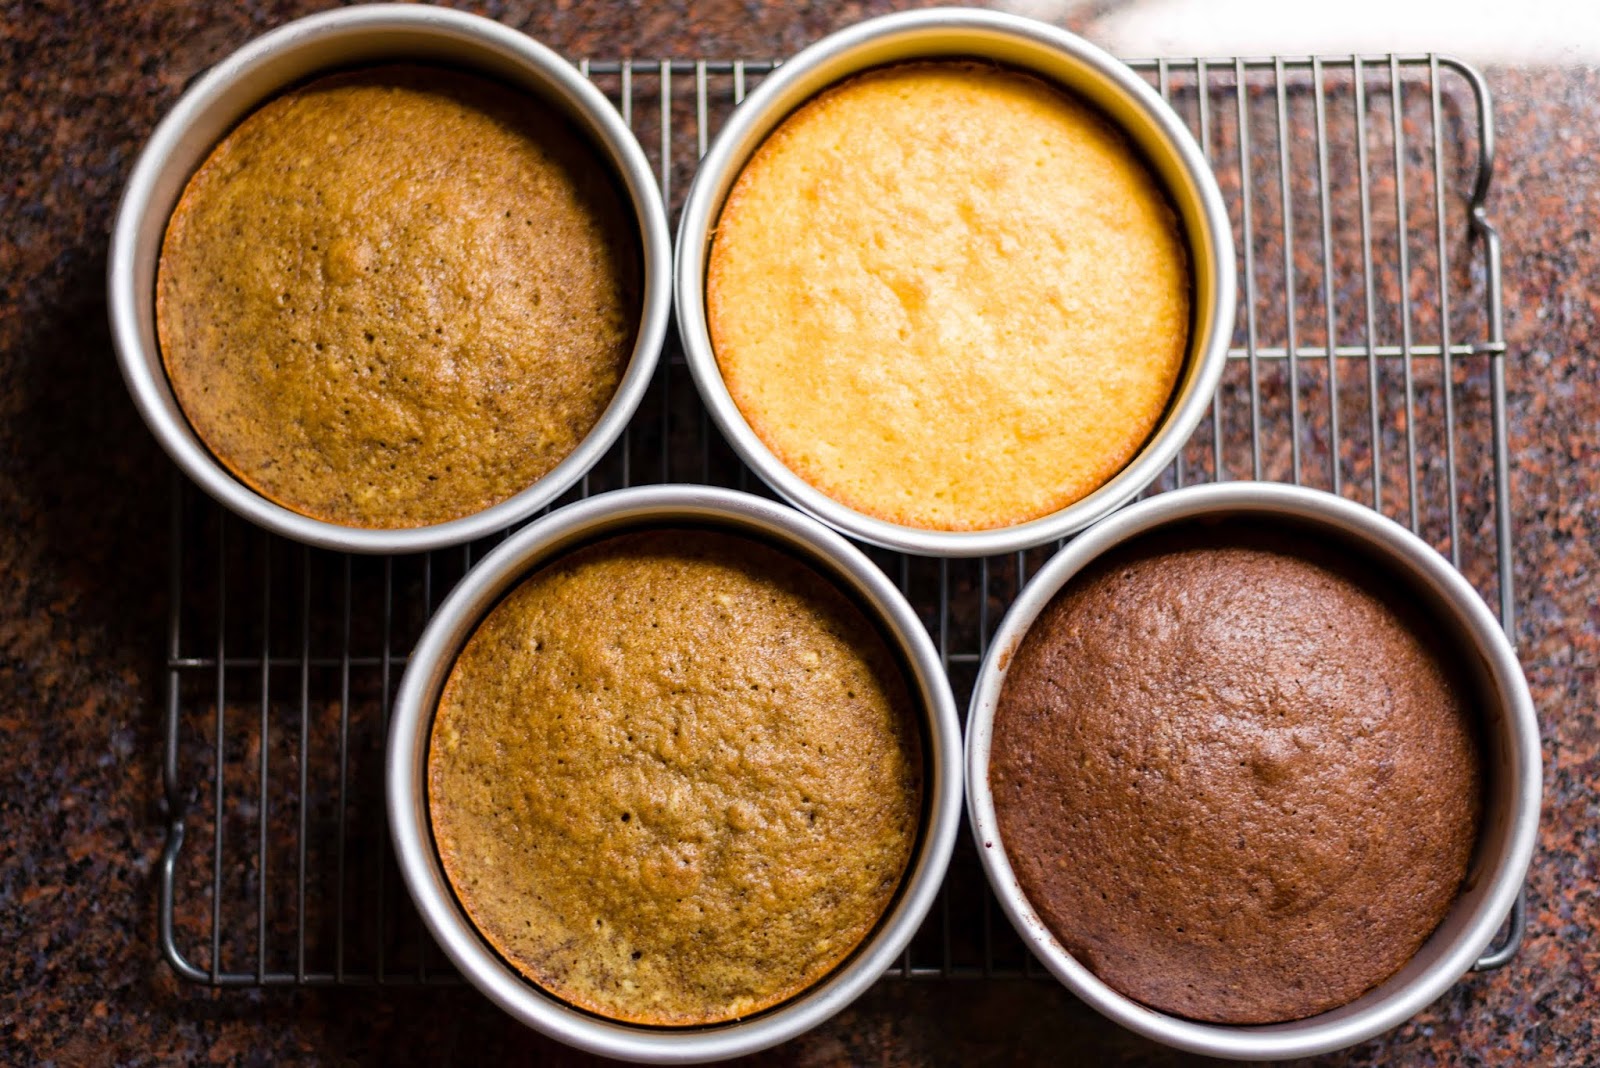
The secret weapon of this recipe is espresso powder (available in many grocery stores), which is used in every element of the cake:
It dissolves easily into whatever you've stirred it into, making it ideal for batters, liquids and even frosting -- all the flavor, zero graininess.

  • How do you make three different types of cake with one recipe? By making one big batch of vanilla batter, then stirring in some espresso powder and cocoa into the corresponding layers.
  • Then tiramisu (can I use that as a verb?) it all by painting the layers of cake with generous swipes of espresso syrup during assembly.
  • The frosting is a not-too-sweet, also-layered mascarpone that ombres (taking another verb liberty) from vanilla to espresso to chocolate, swirling and blending sections together along the height of the cake sides.
  • For an authentic finish, pipe remaining frosting into little dollops on top and sprinkle with cocoa, that handy espresso powder and a touch of powdered sugar.
...all creating an ombre homage for a Very Special birthday girl.

Thursday, May 31, 2018

The legend of tuna noodle casserole...and other maternity advice.

Just entered Week 24! (App 1 tells me she's an ear of corn, and App 2 tells me she's a "demi-baguette.") The cutesy pregnancy literature out there calls the second trimester the "smooth second" because it's the most comfortable time...after the exhausting first trimester and before I become too big to bend over and buckle my sandals. I wouldn't have noticed that I'm nearly done with Part II of III except that Nick had to help me unbuckle a sandal yesterday, so I figured I'd better savor the next couple weeks and commemorate with another post.

As I mentioned in the reveal, I was pretty lucky as far as eating goes in the first trimester -- apart from a brief period of nausea and sometimes-debilitating smell-sensitivity, I didn't have terrible morning sickness nor insatiable, guilty cravings (with the exception of mac and cheese...miraculously I mostly craved fresh fruit). There was one minor meltdown circa Week 12 during which I sobbed into a previously-beloved bowl of ramen that tasted like a cast-iron pan, so filled with fear was I that food would never taste the same again. My older sisters -- one with a five-year-old and two-year-old, and the other with a nearly five-month-old -- reassured me relief was near.

That's been the most wonderful thing about being pregnant...your world becomes this loving melting pot of other people's advice (the most consistent piece being that you will get a lot of inconsistent advice), stuff (thank goodness for the generous collections of rotating maternity clothes, gender-neutral baby onesies and toys and gear) and traditions.

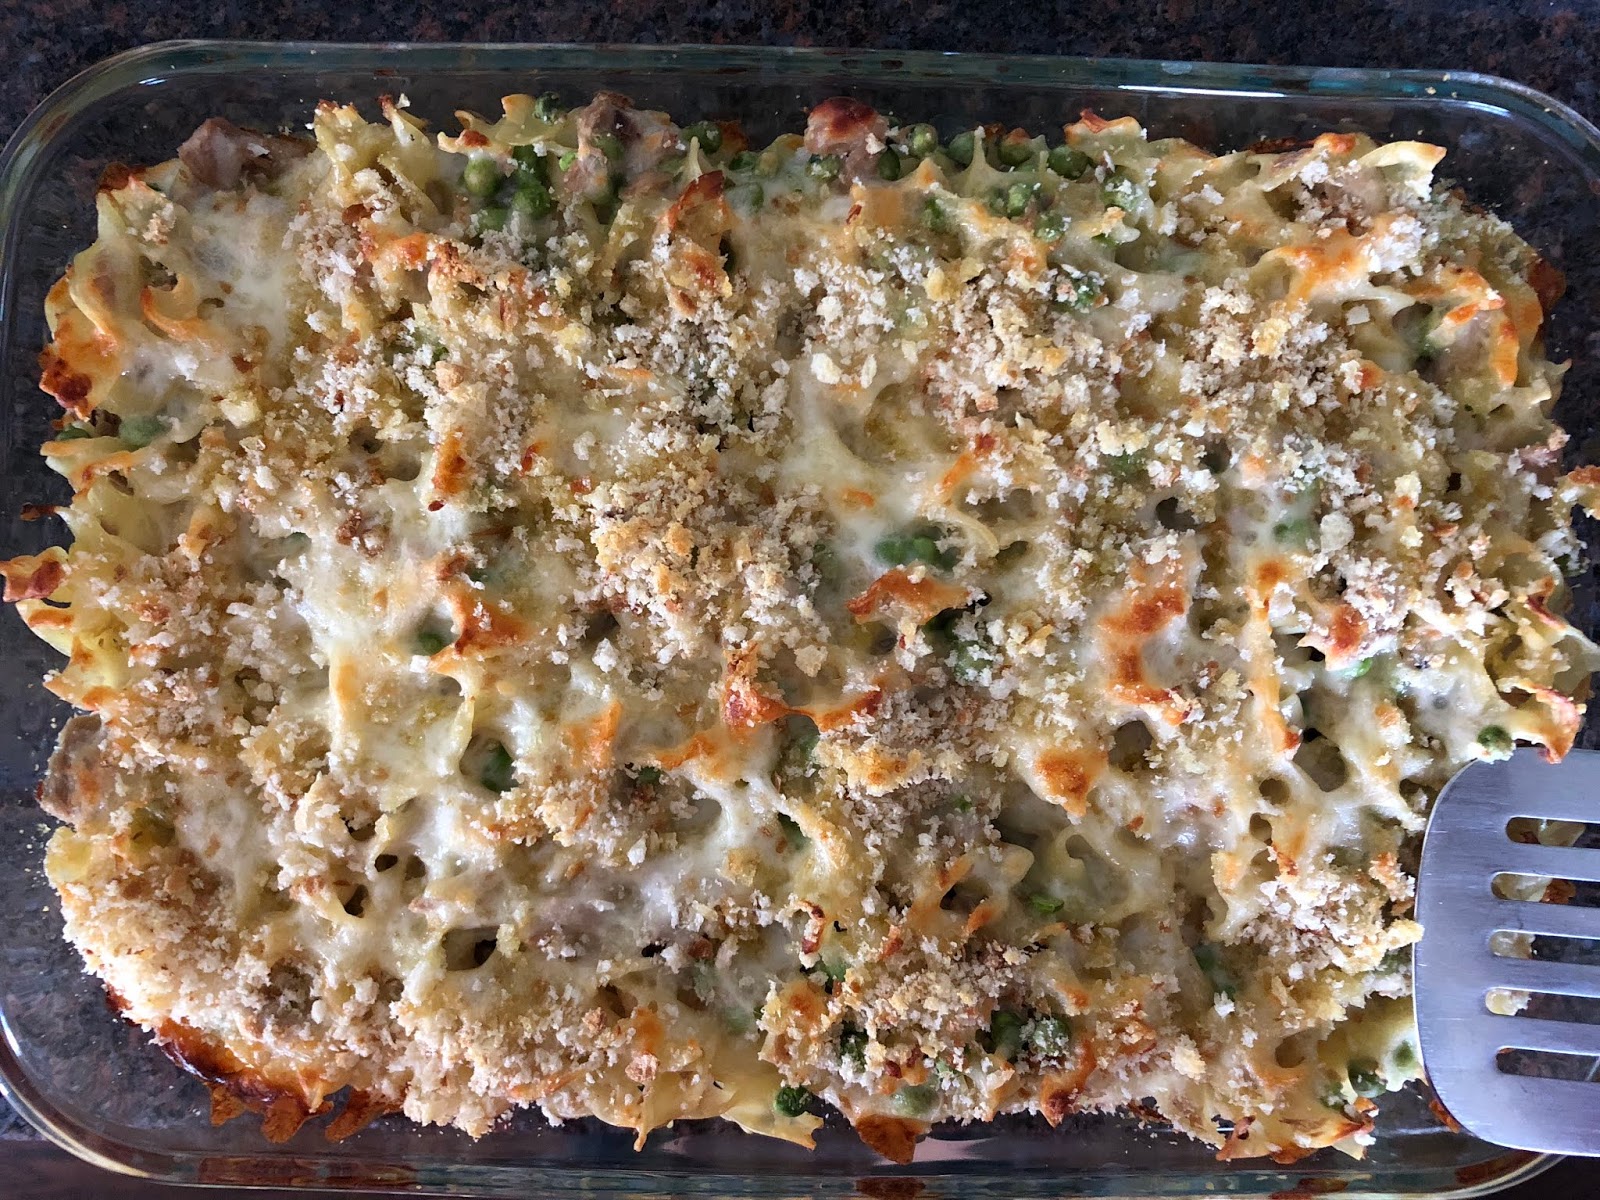
Around Week 16, I was getting pretty fed up (pun intended) with metallic-tasting food when my mom told me that while she was pregnant, she had had basically no appetite and awful morning sickness until a family friend brought over an unlikely meal: tuna noodle casserole and peach pie. She ate both with gusto and was apparently cured.

Regular readers may raise an eyebrow...Campbell's soup and canned tuna? I had grown up eating "tuna bake" with some regularity, and I assure you, it's delicious...but it had been probably over a decade since I had last eaten it. I got the recipe from my mom and gave it a try. It tasted like home, and I ate two giant pieces. Was I cured?? As it turned out, later that week I was back to metal-mouth -- my mom astutely pointed out it was probably because I hadn't made the peach pie -- but it didn't last much beyond that.


*

Gretchen's Tuna Bake
Makes one 9x13" Pyrex (serves 8, or 2.5 pregnant women)

12 oz wide egg noodles
1 can Campbell's Cream of Mushroom Soup
1/2 can volume of milk
8-10 oz canned tuna (look for a brand/grade with low mercury, for Ms. Expecting)
1-2 c frozen green peas
1 c breadcrumbs
2 c shredded mozzarella cheese

Preheat oven to 400*F. Cook egg noodles in boiling, salted water, according to package instructions. Toss cooked noodles with drained tuna (flaked with a fork) and frozen peas. Add soup plus one half can of milk, topping off the rest with water (= 1 full can of liquid once the soup has been emptied). Top with shredded mozzarella and breadcrumbs. Bake 30 min. or until golden brown and bubbly.

Thursday, March 16, 2017

Work from home skillet.

Snow in March. I suppose that's just normal New England weather, right?

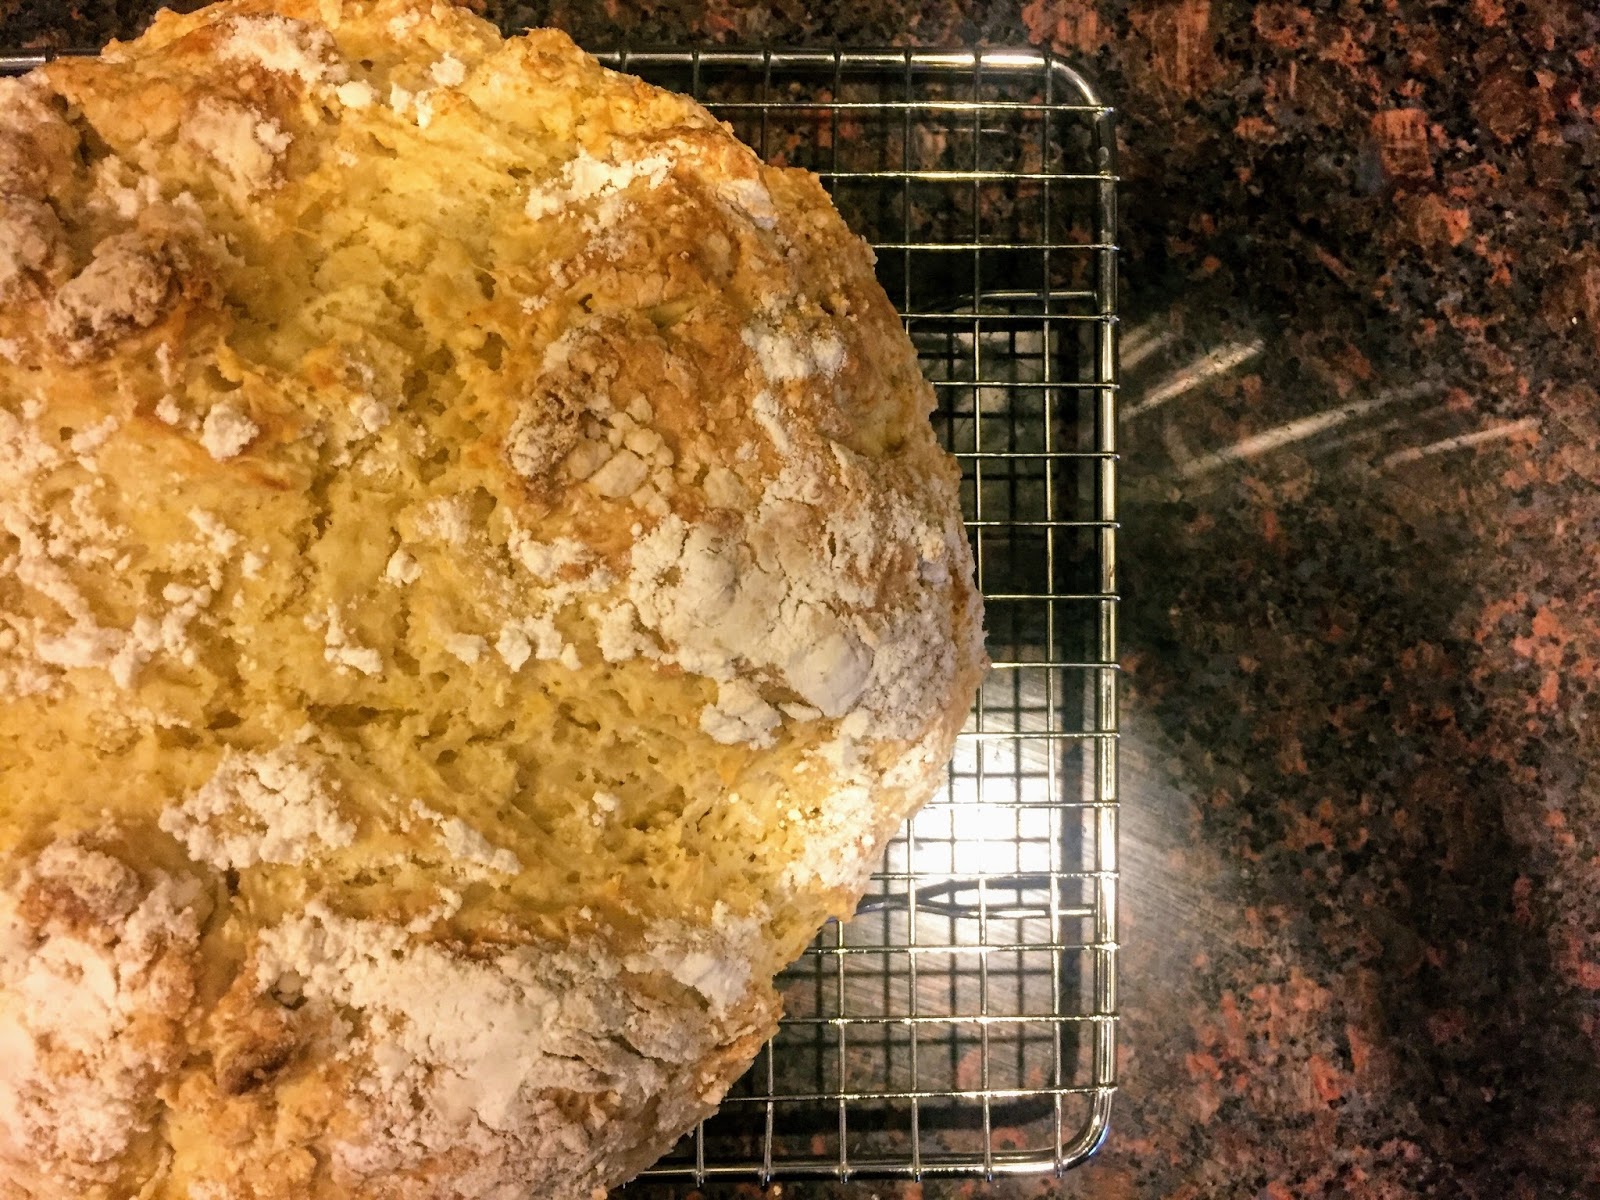
Tuesday marked our ~fourth snow day of the year. What that typically means is that Nick and I creep closer and closer to the fireplace all day long until we're toasting the bottoms of our feet by 5pm. I'm one of the fortunate type who is wildly productive working from home -- of course, we all have our days, but I'm batting a strong average for Winter 2016-2017. And it's not limited to work productivity; this week, for instance: by the time I'm normally rolling into the office (~9am), I had 1) slept an extra hour, 2) done a deck of cards workout, 3) baked a loaf of Irish soda bread and 4) sat down to work.

For those who observe the holiday, Tuesday was also Pi Day: 3.14. Having nothing really appropriate to fill a pie (I planned poorly), and also trying to use up some buttermilk from recent baking adventures (perhaps I planned well after all), I honored math's most popular ratio by bookending my day baking quick breads in a round cast iron skillet. Two breads in one day? Yes, you can have it all.

***A few words about quick breads: While not providing quite the same springy, crusty, airy satisfaction of yeast breads, quick breads are delicious in their own right and (as you might have guessed) quick: no time to rise, very little time to mix up. They get their leavening from baking soda mixed with acid (in my case, buttermilk), and if you use a cast iron skillet, you get a satisfyingly crusty bottom from the even, direct heat of the pan.

In addition to Pi Day traditions and celebration, about half way through the day our next door neighbor rang the doorbell to induct us into a time-honored neighborhood snow-day tradition: impromptu potluck dinners. I was at first excited and then immediately overcome by panic that I had nothing to bring, scant ingredients in my fridge, and a good amount of work left in the day. Cast iron skillet to the rescue again! I had just made a huge batch of chili on Sunday, so I dug some out of the freezer (I would normally never dream of bringing "leftovers" to a potluck, but chili is better leftover anyway), and decided to make cornbread as a side.

Look how perfectly I was able to use up the last drop of buttermilk on the second round (see recipe below for proof):

The best part of a snow day social? It has to be just a few steps from home, so we could stay longer and enjoy the excellent company with a glass of wine (or two).

Irish soda bread:


Cast Iron Skillet Cornbread:


*
(Food52 cornbread contest recipe winner from boozeandsusan)

1 1/2 c coarse yellow cornmeal
3/4 t baking soda
1/2 t coarse salt
2 large eggs
1 1/2 c buttermilk
1 1/2 c T maple syrup
4 T unsalted butter

Preheat an oven to 425*F. Heat a 9-10" seasoned cast-iron skillet in the oven for 10 min., until very hot. 

Combine cornmeal, baking soda and salt in a bowl. In a separate, large bowl, whisk together eggs, buttermilk and maple syrup. Remove the hot skillet from the oven and add the butter, swirling until it's melted. Working quickly, pour the hot, melted butter into the egg and buttermilk mixture, and whisk until combined. Add dry ingredients and whisk until just combined.

Pour the batter into the hot skillet and and bake until golden, 20-25 minutes. Allow cornbread to slightly cool before cutting.

Thursday, March 2, 2017

Good to Grey(t).


I've always been a cake kid. Scratch that, I've always been a frosting kid. I like my cake-to-frosting ratio to be about 1:1. I'll break the bottom off a cupcake and give it away in order to maximize the ratio. I generally reject muffins because they're just sad, frosting-less cupcakes.

I have strong feelings about cake and frosting.

Which is why when I discovered this amazing recipe by Tessa Huff (featured in Layered), I became completely obsessed. I learned two things:
  1. Swiss buttercream is NOT that difficult
  2. Egg whites freeze beautifully (I triumphantly was finally able to use leftover egg whites I had frozen when I made a chocolate pie that used nine egg yolks - see future post)
My classic "buttercream" frosting recipe is a bit of a cheat - butter/shortening + powdered sugar + vanilla + salt. I've always been intimidated by real buttercream because it involves cooking egg whites to 160*F and then whipping them into a frenzy with sugar, softened butter and some kind of flavoring. One key benefit is you can use much less sugar - perhaps because the egg whites are what are providing more of the body? - and the other is that you can infuse the butter with delicious flavors before adding to the egg-frenzy because you're less dependent on the firm butter texture holding up the whole thing. I must admit, I might be a convert.

This past weekend was the bridal shower of a very dear friend who happens to love London Fog lattes. When I found this recipe, it seemed like an obvious choice to honor the bride-to-be, and it has swiftly earned top-tier status in our house. For those of you not familiar with a London Fog latte, it's steamed milk with Earl Grey tea and vanilla. I used my classic family chocolate cake with Tessa's Earl Grey + vanilla bean buttercream and salted caramel topping. The frosting isn't overly sweet in general, and the bergamot is super subtle and floral.

Please, someone have a birthday, or a baby, or finish your taxes, or any occasion so I can make this cake frosting again.


Earl Grey Buttercream
(adapted from Tessa Huff)

2 c unsalted butter, at room temperature
1/4 c loose Earl Grey tea (I pulled open five tea bags)
4-6 egg whites (about 1/2 c + 2 T)
1 1/4 cup granulated sugar
1 1/2-2 vanilla beans, scraped
1/2 t vanilla extract
pinch of salt

Place 1 c butter in a saucepan with the loose tea. Melt butter over medium, then reduce the heat to low and simmer for 5 min. Remove from heat and let the tea steep for 5 min. more. Strain butter through a fine-meshed sieve set over a bowl, and refrigerate until it reaches the same consistency as softened butter, 20 to 30 minutes. Small bits of tea may remain in the butter - not a problem (especially since you'll be adding vanilla bean).

Place egg whites and sugar in the bowl of a stand mixer. Whisk by hand to combine. Make a double boiler with a few inches of water heated in a saucepan/place the mixing bowl on top (don't let the bowl touch the water). Whisking intermittently, heat the egg mixture until it reaches 160*F on a candy thermometer or is hot to the touch. Carefully fit the mixer bowl onto the stand mixer.

With the whisk attachment, beat the egg white mixture into a total frenzy on high speed for 8 to 10 min., until it holds medium stiff peaks. When done, the outside of the mixer bowl should be basically cool/room temperature. Stop the mixer and swap out the whisk attachment for the paddle.

With the mixer on low speed, add the vanilla bean/extract, tea infused butter, salt and remaining 1 c butter, a couple tablespoons at a time. Once incorporated, turn the mixer to medium high and beat until the buttercream is silky smooth, 3-5 min.

Wednesday, January 18, 2017

(Not-so) Extreme cooking.

Happy 2017! Regardless of your political convictions, many will agree that the back half of 2016 was ready for a Whole30 cleanse/detox of sorts. One of the things I look forward to most every January is the influx of inspiration for healthful recipes.

Now, readers of this blog might scratch their heads at the idea that I get enthusiastic about kale and coconut aminos, but in order to eat the way we publish, we eat reasonably healthfully between all the saturated fats. I believe in "Everything in moderation, including moderation," and I subscribe to the theory that a balanced diet is a glass of red wine in one hand and a bar of high-quality dark chocolate in the other.

Presenting: my add-to-anything secret weapons:

  • Farro (okay, some people think grains aren't okay, but to them I say THEY ARE DELICIOUS AND FILLING)
  • Avocado (the plant kingdom's butter) - as my dear friend Janet taught me last week, a pinch of black lava salt flakes makes it even better
  • These roasted chickpeas (on salad/in grain bowls)
  • Any roast vegetable with lemon juice
(As a matter of fact, you can mix all of these together and have an awesome lunch...maybe toss in nuts or sesame seeds for crunch, or an egg if you're super hungry?)

But after a while even the old stand-bys in different combinations can get boring -- this time of year sparks creativity in the kitchen as people desperately try to coax flavor and excitement out of raw foods and make awkward substitutes for what we really crave. I believe we should love kale for kale...don't sneak it into things where it doesn't belong, just for the health benefits. Don't make a burger and pretend beets are beef...cook beets in a way that celebrates their beet-ness.

In design, there's a theory that creating products and solutions for extremes (user-outliers such as super tall people or lefties -- my husband, in both cases). If you can solve the problem for those people, you can solve for everyone. In cooking, I learn flavor profiles and texture combinations from both ends of the health spectrum, and we never sacrifice deliciousness for nutritiousness.

Tonight's dinner included white pasta (*gasp!*) but a boatload of greens and bold flavor. The best thing was that it only took about 20 minutes to make, leaving me the rest of the evening to snuggle up with my blog.

*

Sesame Kale Noodles
(adapted from The Kitchen Girl - amped the veggies and adjusted the sauce based on what I had at home)

Noodles for four (to me, that translates to 1/2-2/3 lb)

1/4 c sun butter
1 T sesame oil
Juice from 1 lemon
2 T water
1 T soy sauce

2 T olive oil
2 c Brussels sprouts (thinly sliced)
1/2 c red onion, diced
4 T sliced almonds
3 T black and white sesame seeds
6 c kale

1 T yuzu juice if you have any (or Meyer lemon - the yuzu made the sauce incredibly bright)
avocado (because see above)

Cook pasta in boiling, salted water according to package directions. Whisk together sun butter, sesame oil, lemon, water and soy sauce and set aside.

Heat olive oil in a large saute pan over medium-high heat and cook Brussels and onions for 4 minutes. Add almonds and sesame seeds and toss for another minute. Add kale and wilt for 2-3 minutes. Toss with sauce and noodles until warmed through/kale is wilted, then sprinkle with yuzu juice, more sesame seeds and avocado cubes.

Thursday, October 27, 2016

The spice of life.

A friend recently had a baby, so I made lasagna, because it's what you do when babies are born. Unfortunately lasagna is one of the weaker parts of my game, so I went to seek expert advice: my dear friend with an Italian grandmother. I've had her lasagna on multiple occasions, and it's really an art to get the correct balance of creamy ricotta cheese, enough but not too much sauce, perfect al dente pasta, and not too much mozz blanketing the top layer. It took me a few days to pluck up the courage to ask for the family recipe, and she kindly obliged (I think she understood that lasagna is what you do when babies are born).

Not only did I get a photo of her recipe card, I got all the unwritten margin notes from her years of experience making it. I am sworn to secrecy and can't share the recipe, but I will tell you that it does take advantage of a great tip I also found online (so I feel comfortable sharing from an intellectual property perspective): cook meat in the tomato sauce, then remove the meat before using the sauce in the lasagna. The savory, meaty flavor pervades the tomato sauce, but you don't have the extra texture or potential dryness to deal with (PLUS in my case of using meatballs to flavor the sauce, we got a lovely second meal for our troubles). I shared my recipe for oven-roasted tomato sauce, in which I cooked the meatballs, below.

Here's my favorite part about this recipe: all that week I bragged to anyone who would listen that I was in possession of a real nonna's lasagna recipe - like, from the Old Country. A few weeks later when I saw my friend again, she asked me how the recipe turned out, and we exchanged notes. I thanked her again profusely for so generously sharing her family treasure, and she laughed. She had actually told her 93-year-old grandmother that she shared the recipe with me, and their conversation went something like this:

"Lasagna?" (puzzled) "I gave you a family lasagna recipe?"
"Yes, Grammie."
"We made plenty of pasta growing up, but lasagna just wasn't worth the trouble for how many mouths it could feed. I got that recipe off the back of a Prince® box."

We laughed for about ten minutes. Of course, she had adapted the recipe with some nonna magic that the pasta conglomerate didn't include, but this is actually not the only instance I've heard recently of shocking discoveries that beloved family recipes, in some form, sat mass-printed on grocery store shelves across America. We romanticize what's been passed down and shared over generations because, for many of us, our childhood memories of simmering pots and comforting favorites are so key to our relationship with food today. But I have my own proof that nostalgia and love are the most important ingredients that make recipes so special.

Of course, let's not forget Phoebe's grandmother's chocolate chip cookies:

*

My (Not-Secret) Oven Roasted Tomato Sauce
Makes enough for 6-8 servings of pasta

2 lb tomatoes, each cut in half (I used a mix from our CSA, but I've heard roma tomatoes recommended most often)
4 cloves garlic, minced
1 yellow onion, diced
salt and pepper
herbs - I use oregano and thyme
olive oil

Preheat oven to 400*F. Line a baking tray with foil. Place cut tomatoes on the tray in a single layer, drizzled with olive oil (1-2 T) and season generously with salt, pepper and herbs - it'll be something like 2-3 t of coarse salt, and 1-2 t of the herbs. Roast for 30 minutes and then add intervals of 10 minutes more as needed until the skins are splitting and the surfaces are caramelizing.

Meanwhile heat olive oil over medium heat in a large saucepan or dutch oven, then saute onion and garlic for 10-15 minutes or until translucent, seasoning with a pinch of salt and pepper. When the tomatoes are done roasting, add to the garlic and onions and stir together, cooking over low heat for 5-10 minutes. Taste and adjust seasonings.

I like a chunkier sauce, but if you don't, run an immersion blender/food processor until you achieve the right texture (beware the sauce is molten tomato, so it'll be HOT if it splatters).


Monday, October 17, 2016

Flip the bird.

I subscribe to a lovely website called Tasting Table, filled with cooking tips, restaurant highlights, food trends and more. This week they re-ran a piece from earlier in the year, called 20 Recipes Every Twentysomething Should Know How to Make. The list includes many of the usual suspects: a good steak, mashed potatoes, chicken noodle soup, cheesecake, etc. As I cling to twentysomething status just a bit longer, I'm happy to say that for me this list is mostly under the (tightening) belt.

One which has always intimidated me, however, is Number 16: roast chicken. Now, I actually roast chicken quite often: my mom's foolproof 350*F/35 minute method is perfect for bone-in, skin-on chicken legs, thighs, wings and breast pieces. The parts all cook pretty evenly, and cook time is weeknight-friendly. But there's something about a crisp, golden-brown, whole bird which is just so mouthwatering and virtuous. Of course, it's also time-consuming and high-maintenance: pat dry. Season. Truss. Baste. Invert to keep the white meat juicy and dark meat cooked. Do a chicken dance. Every Thanksgiving I summon all my courage to tackle the turkey because I love sharing it with friends and loved ones (and because there's no gravy like turkey roasting pan gravy), but I will admit that I get quite stressed about it. In theory, chicken is a nice way to practice throughout the rest of the year, and it makes a grand weekend dinner with practical leftovers for weekday lunches.

Last winter we went skiing with a family friend who shared her favorite, low-maintenance roast chicken: the key is to blast it with heat and keep flipping - this ensures a nice even tan, no basting required. It's Joel Robuchon's roast chicken, minus the giblets and plus equator-sliced heads of garlic as stabilizers (lay them cut-side down on the pan to prevent the bird from tipping over as you lay it on various sides). Here's the magic formula once you've buttered and seasoned it:

400*F/25 min/25 min/10 min/5 min (start on its side, flip to the other side, then lay on the back and then end on front)

My sister gave me the encouragement (and the recipe link) to try it together, and we were well rewarded for our experimentation. What did we learn? In general, as with many other intimidating foods, just show it who's boss. If it falls down, nudge it back up. If you tear the skin as I did once during the flipping process...

...just turn it around for the photo.

(No one will see after you carve it anyway.)

Wednesday, August 10, 2016

The grass is greener.

When we were looking at houses, initially we were looking closer to Boston. We still have friends there, my sister lives there, and I work pretty deep in the city. Of course, right around the time we saw what it was like to have a yard and multiple parking spots, reality set in (and I remembered how much I hated moving), so we decided to look for the long term. This meant moving to the suburbs. We are very lucky in that we still live close enough to be accessible to the main subway instead of being fully reliant on driving/commuter rail, but we are far out enough to enjoy having space to have a yard to mow. There's even a section which would make a perfect garden plot...if I didn't kill most plants I've ever tried to grow:

  • Exhibit A: The African violet I tried to keep alive in my dorm room in college. (I anxiously brought it to the florist hoping they could give me tips to resuscitate it. He took one look at it, tossed the pot in the trash and gave me a new one, free of charge.)
  • Exhibit B: The tomato plant I tried to grow on my balcony in D.C. (You know, the garden item people say grows like a weed and you'll just be giving them away? I got maybe six golf ball-sized tomatoes off the vine before it shriveled and died.)
  • Exhibit C: The potted gardenia my mother-in-law got me as a Christmas gift one year. (It didn't last until Valentine's Day; in fairness, my cat ate it.)
  • Exhibit D: The air plant my colleague kindly got me as a parting gift. ("You literally can't kill it - just spritz it once in a while," she said. It died a spiny death when I forgot to spritz it.)

I wouldn't be so bold to claim that Suburban Bev is some bizarro green thumb, and I don't want to jinx anything, but five months later, my herbs are thriving on the deck:
(basil: for pesto and anything with tomatoes)

 (rosemary: for lamb and the like)

(mint: for mojitos and such)

(thyme: for everything)


For all the herbs I buy at the grocery store in packs which wilt faster than I can use them up, it's delightful to be able to harvest nature's fragrant offerings in only the amount needed at the moment. In fact, my basil is growing so well that I actually get enough leaves at a time such that I can harvest the amount needed for pesto...and more leaves grow back in their place!! Experienced gardeners will point out that that's what's supposed to happen with live plants, but there's a first time for everything. Drunk with power, I made plans to buy a lemon tree and peonies and perhaps even tomatoes again, which my sweet husband encouraged.

Maybe we'll just get through this growing season first.


*

(served above with whole wheat spaghetti, oven-roasted asparagus and a poached egg)

Basic Pesto
Makes enough for 4-6 servings of pasta depending on how saucy you like things.

3-4 c basil leaves, washed
2 cloves garlic
1/2 c pine nuts
zest and juice of one lemon
1 c olive oil
1 c grated Parmesan cheese
salt and pepper to taste

Combine basil, garlic, pine nuts and lemon zest/juice in a food processor - whir until chopped and blended. Drizzle in olive oil while the food processor is running until everything comes together. Stir in cheese, salt and pepper; taste and adjust seasonings.

To store: the basil will oxidize pretty quickly, so in whatever container you store leftovers, pour a thin layer of olive oil over the top. Pesto freezes nicely (especially in ice cube trays which are easy to pop out for individual servings later).

Note: You can substitute spicy greens such as arugula for the basil, and other soft, oily nuts such as pistachios and cashews for the pine nuts. If you're going nut-free (technically a close cousin, pistou), you can do something like this.

Saturday, January 30, 2016

South by Southeast (Asian).

After all-I-could-eat butter chicken, naan and paneer in Delhi, I noticed there was also a lot of Thai and pan-Asian food in India. As you may remember from my epic 2011 Soupbet battle (whose archives appear to be buried deeper in the Internet than I can find anymore), I kind of go into withdrawal if I haven't had noodle soup in a few days.

Fortunately (even at the wedding) there was noodle soup to be had! I must confess that I had more than one bowl:

Yes, you're seeing two kinds of noodles in there: wheat noodles and bean thread noodles. I was in heaven.

The rich, coconutty, slightly acidic soup haunted me all the way home, so the first dinner stateside I cobbled together a winter-warming Thai coconut chicken soup (tom kha gai). My usual approach for replicating dishes is to Google a few recipes and triangulate my own, and it proved useful to develop the general flavor profile: coconut, lemongrass, ginger, lime, chili and fish sauce. My finished product was less rich and less yellow (a little more curry paste and coconut milk likely would have gotten the consistency closer), but the flavor was spot-on.

*

Tom Kha Gai
Serves 4 (hungry people)

2-3 baby bok choy


1 lb boneless chicken breast
1 T corn starch
1 T oil
1/2 onion, minced
2 garlic cloves, minced
2 T green curry paste
5 c chicken stock
1 15-oz can coconut milk
1 stalk lemongrass
1" piece ginger
1-2 limes
fish sauce (1 T, to taste)
8 oz mushrooms
2 T cilantro, minced
salt and white pepper to taste
a few drops sriracha
bean thread noodles for two (this is subjective :), but one knot is usually enough)
wheat noodles (Asian noodles if you have them, spaghetti is fine if not) for two

Heat oil in a medium pot over heat. Saute onion and garlic for 3 min. Add curry paste and saute for 3 more min. Add stock and coconut milk and bring to a boil, then simmer over low heat.


Bruise the lemongrass stalk (smash it a few times with the back of a heavy knife), then add to simmering liquid with ginger. Zest and juice limes, then add half the juice and zest to the brew. Slice mushrooms, and simmer all for 10-15 min. Season with salt and white pepper.

Meanwhile...
Wash and cut up baby bok choy into 1/4-1/2 inch strips (crosswise).

Cut up chicken into slices/small cubes and season with cornstarch, salt and pepper; set aside.

Cook noodles: boil wheat noodles in salted water according to package directions. Soak the bean thread noodles in hot water to soften.

After simmering for 10-15 min., remove whole ginger and lemongrass pieces from broth. Add chicken and bring to a boil, cooking for about 3-4 minutes or until opaque all the way through. Add bok choy and barely bring back to a boil. Add fish sauce and remaining lime juice and zest to soup, then taste and adjust seasonings as needed. Season with cilantro and a few drops sriracha for additional heat; add drained noodles and enjoy.


Monday, November 23, 2015

Monday night braise.


Pats playing at home, time for another braise. Tonight's post is about how to braise on a weeknight. What? After a day of conference calls and commuting, you want to slave over a hot stove for hours? Certainly not. The key is not to plan to eat it for dinner, but to make a not-sad-desk-lunch for the next day. Remember, a braise is best the second day. True, you'll need to plan for something else for tonight's dinner, but we're braising on Monday night...and nobody said anything about slaving.
Here's how:
  • Grocery shop the day before - no need to fight both the clock and traffic
  • Prep what you can the day before - mincing, chopping, measuring can all be done ahead
  • This is true for cooking any day, but identify the long pole in your meal plan and start it first. For example, I cooked pasta and sautéed kale once the chicken was in the oven...and managed to make two loaves of pumpkin bread too, but I've been doing this for a while.
  • Chicken braises fastest - for best results, use dark meat...don't worry, nestling everything together in the heavenly sauce will protect it from microwave sadness the next day, and dishing it up into to-go containers will cool it quickly so you don't have to stay up waiting for it.
The Score: (W - L / home game braise coverage - misses)
Patriots: 9 - 0, Bev: 2 - 1 (out of town)

*

Braised Chicken with Lemon and Capers
Adapted from NYTimes Cooking - because I don't care for olives, and I like it saucy.

Serves 4

2 chicken legs, cut into thighs and leg pieces, skin-on and bone-in
Salt and pepper
1/2 t red pepper flakes
6 garlic cloves, minced
1/2 t fennel seeds
1 T roughly chopped rosemary
1 T olive oil
2 lemons, cut in wedges
2 T capers
1 1/4 - 1 1/2 c chicken broth

Mix salt, pepper, red pepper flakes, minced garlic, fennel seeds, rosemary and olive oil in a baking dish. Rub seasoning all over chicken parts, sprinkle with capers, tuck lemon wedges in wherever they fit and let sit for 15 minutes. Preheat oven to 375*F.

Put baking dish in oven, uncovered, and bake 20 min. Cover with foil tightly (don't burn your palm like I did) and bake for 1 hour, until meat is very tender and falling off the bones when poked. Remove thighs and lemon wedges. Pour remaining juices into a pan and simmer until reduced by half; meanwhile, shred the chicken and remove skin and bones (for an easier desk lunch experience). Mix shredded chicken back into sauce and serve over a bed of spicy sautéed kale and pasta.


Wednesday, November 4, 2015

In a braise of glory.


Oh, fall, how do I love thee? Let me count the ways:
  1. Hot apple cider
  2. Football season (or at least snuggling up with those parked on the couch)
  3. Crisp mornings
  4. Cozy wool jackets
  5. Apple picking
  6. Boots
  7. "Fall Back" (woohoo!)
  8. Foliage
  9. Our friends' annual lakehouse retreat (yes, I realize this is not the first time I've written an ode to fall in the form of a list)
  10. Return of the braise
If you haven't all read Cooked by Michael Pollan, I highly recommend it. Not only is it a delicious read, but it's extremely informative and does a great job distilling cooking methods down to the four elements: fire (barbecuing), water (braising), air (baking), earth (fermenting/pickling/brewing). The chapter on braises in particular was reassuring and demystifying: sauteed aromatics + browned meat + simmering liquid. How hard could that be?

There's something particularly satisfying about taking all day to chop, lovingly brown and impatiently peek into a burbling pot of deliciousness while your aforementioned football-watching-couch-snuggler is within arm's reach. Every time you open the lid a magical steam bursts forth and the pot's contents have transformed yet again.

A braise is always a great way to use up fridge vegetables, take advantage of an inexpensive cut of meat, and at the very least make neighboring pets curious.

Braises always get better with age and are a wonderful excuse to eat pasta.

Speaking of excuses, braises always warrant spending unnecessary amounts of money on gorgeously hued, enameled cast iron (you saved all that money on a reasonable cut of meat!).

My goal is to make a new braise every time the Pats play at home. Here's the latest (we were fabulous and served it over gnocchi):

*

Spicy Pork Ragu

3 to 4 lb pork shoulder roast (ideally bone-in)
Salt, pepper and olive oil to season the roast
3 T olive oil
2 c diced onions
1/2 c diced green bell pepper
10 large brown mushrooms, sliced
4 cloves minced garlic
1/2 t crushed red pepper flakes
1/2 t dried basil
1/2 t dried oregano
1 t ground fennel seed
1/2 t black pepper
1/2 t salt
28 oz tomato puree
14 to 15 oz can of whole plum tomatoes, chopped

Preheat the oven to 425*F. Season the roast generously with salt, pepper and olive oil; roast for 30 min. until brown.

While the pork is roasting saute the onions, green pepper, mushrooms and garlic in olive oil in a Dutch oven until the vegetables just begin to soften. Stir in the basil, oregano, red pepper flakes, ground fennel, salt and pepper and saute a minute more. Add tomatoes and tomato puree.

Snuggle the roasted pork down into the sauce, cover and roast in the oven at 350*F for about 2 hr. After 2 hr., remove the roast from the Dutch oven and pull the meat off the bones, shredding as you go - this is key. Return the meat to the pot, cover and continue to roast at 325*F for 1-1 1/2 hours.

Serve over excused pasta and bask in deliciousness.


Wednesday, July 1, 2015

The greatest scapes.

Happy summer, everyone! What a crazy start it's been, kicking off non-stop travel and/or hosting family in town for just about two straight months. We've also taken summer cooking to the next level with the wonderful addition of our Land's Sake CSA, which I've been anticipating for a while. Every Thursday I brave rush hour traffic into the suburbs to retrieve fresh greens, herbs and a continually evolving cornucopia of other delights. It sounds kind of silly, but it struck me the first time I was washing lettuce from the farm that there was actually dirt between the leaves. Each week fellow CSAers select a set of items from crates of harvested goods listed on a blackboard (last week: cone cabbage, rainbow chard, curly kale, Hakurei turnips, butter lettuce, zucchini, zephyr squash, dill, cilantro, garlic scapes), and then there are you-pick vegetables from the field as well (peas, thyme, sage).

It's been highly educational so far...first of all, I've never seen a pea on the vine. I actually caught myself giggling as I plucked the fat, green pods off their curly vines (could I help it if one or two popped right open into my hand, little jewels defying gravity and somehow falling upward into my mouth?). Let me tell you, it took me quite a bit of time and effort to harvest just one little basket of peas.


Secondly, I learned that you can eat turnip leaves! (They turned out lovely, sautéed with their roots in butter, served over farro.) Thirdly, garlic what? (Even Chrome spell check doesn't recognize "scapes.") The helpful weekly newsletter Land's Sake sends included both a description ("These wild tendrils, tamed into bunches each day, are actually the flower stalks of our garlic plants...although green and tender, scapes retain a garlic taste") and a recipe for garlic scape pesto. I adapted it just a tad by adding a bright zing of lemon and added my slaved-over field peas, and dinner was wonderfully garlicky, light and satisfying. Looking forward to whatever else this summer brings.


*

Spaghetti with Garlic Scape Pesto and Sugar Snaps
Pesto makes 8 servings; use half the sauce with the listed amounts of spaghetti and peas, and keep the rest up to a week in the fridge/freeze after.

1 1/2 c roughly chopped garlic scapes
zest and juice from one lemon
1/2 t Kosher salt
1/4 t ground black pepper
1 c olive oil
1 c grated Parmesan cheese

~12 oz sugar snap peas (remove the tough strings on either side of the pod)
8 oz spaghetti

Bring salted water to a boil for the pasta. Meanwhile, combine garlic scapes, lemon zest and juice, salt and pepper in a food processor and pulse until well chopped but not smooth. With the food processor running, slowly pour olive oil in a stream to incorporate into a slightly chunky paste. Add cheese and pulse to combine. Taste and adjust seasonings as you like.

Cook pasta and in the last 2 minutes of cook time, add the peas and cook until bright green. Drain peas and pasta and add generous spoonfuls of pesto. Sprinkle a little more Parmesan, twirl on a fork and enjoy!