Showing posts with label cookies. Show all posts

Saturday, December 22, 2012

Freshly minted.

It's that time of year again! My annual baking frenzy has come and gone, and things are quieting down as everyone heads home for the holidays.

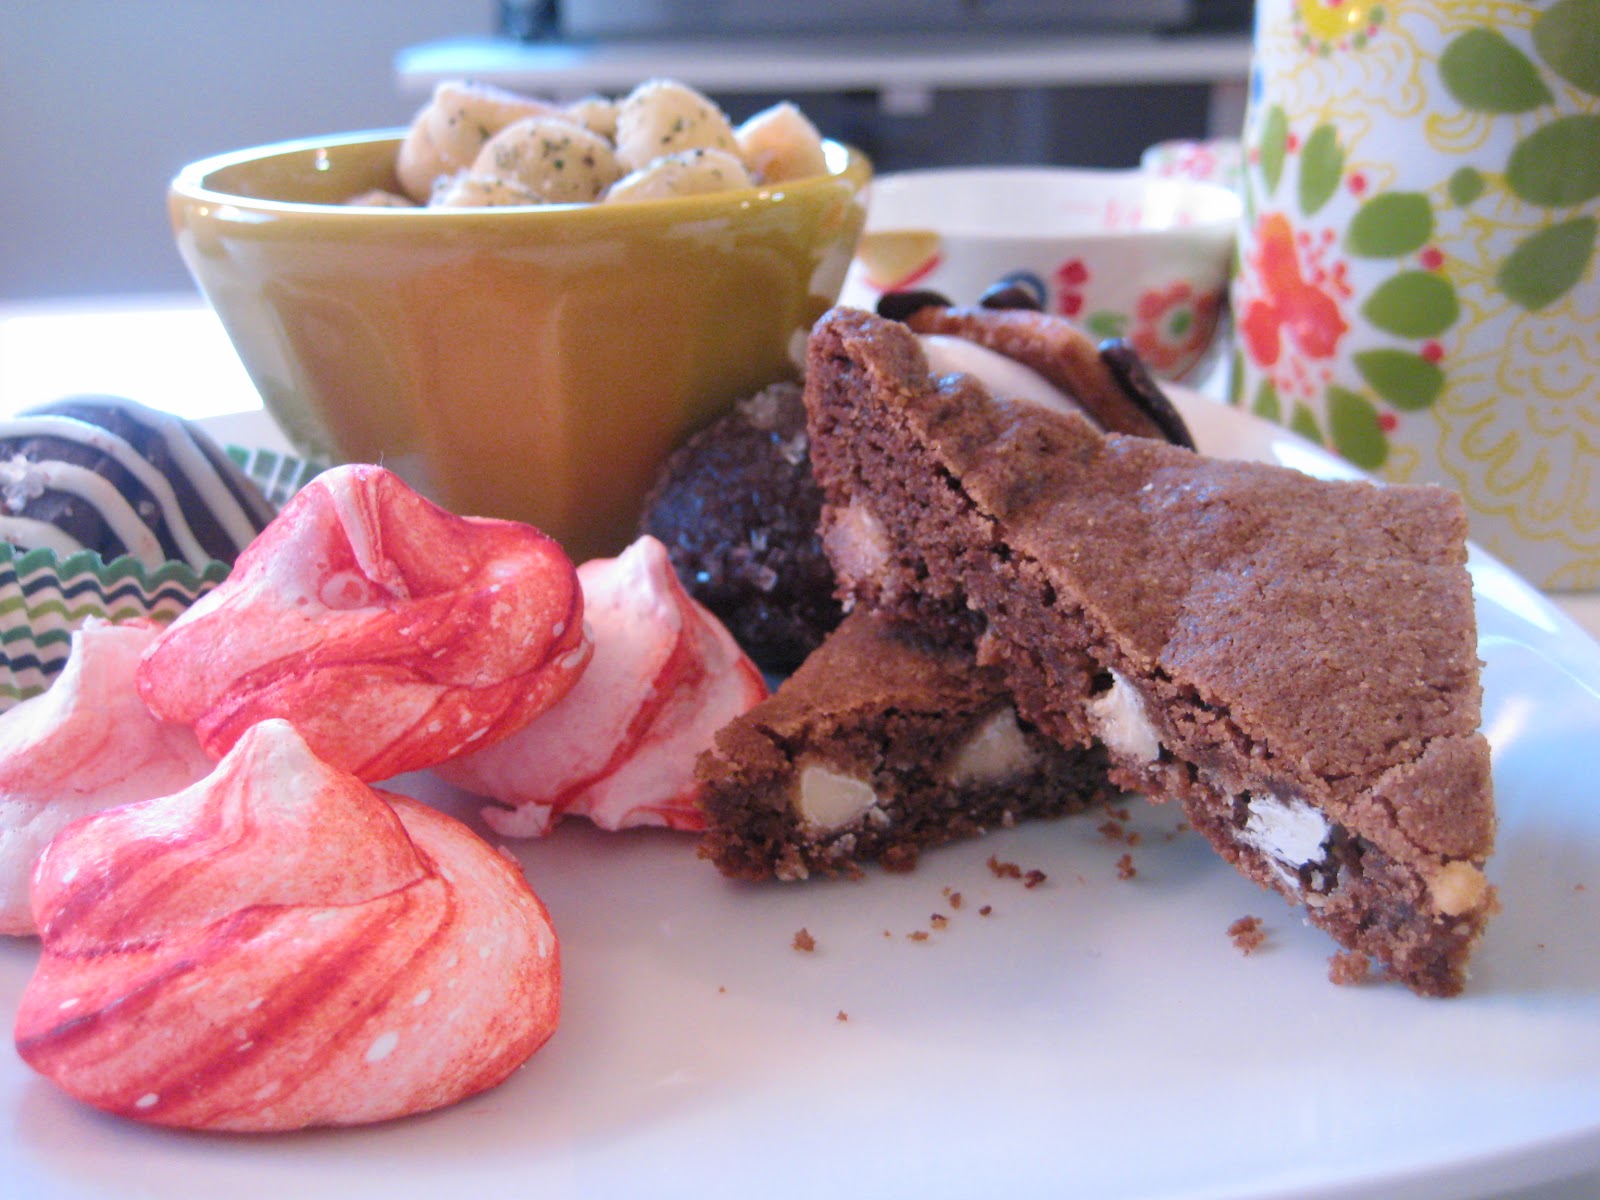
Last week I posted about some repurposed peppermint extract I used to spice up my hot chocolate -- its original intent was these little darlings:


My magic Martha Stewart cookie book was the source for these light-as-air peppermint meringues. Instead of making the meringue sandwiches with ganache in between, I just made the meringues themselves. I try to make a variety every year -- some sweet, some savory, some chocolatey, some fruity, some refreshing and light. This year's line-up:
  • White chocolate chip gingerbread blondies
  • Ranch oyster crackers
  • Smoked paprika cashews
  • Lemon squares
  • (Back by popular demand) Grand Marnier truffles, s'more cookies, and rosemary cayenne cashews
These little peppermint meringues are so simple to make yet so festive and pretty. The trick is painting stripes of gel-paste food coloring into the pastry bag before piping them -- mine were not Martha Stewart-professional, as I lacked a large enough star tip to make the fancy edges (as well as the ambition to put together an actual pastry bag -- a gallon Ziploc bag works just great), but the red swirl was just what I was going for.

I was never a huge meringue gal, as I often find them to have a bit of a styrofoam texture, but these were surprisingly crisp and tasty (and diet-friendly!), adding some good variety to the mix.

*

Peppermint Meringues
(Makes 5-7 dozen meringues)

3 large egg whites
3/4 cup sugar
1/2 teaspoon pure peppermint extract
Red gel-paste food coloring

Preheat oven to 175°F. Line two baking sheets with parchment paper. Take a gallon Ziploc bag and cut off one of the corners, about 1/2" wide. Set aside.

Make meringues: Put egg whites and sugar in the heatproof bowl of an electric mixer. Set bowl over a pan of simmering water, and stir gently until sugar has dissolved and mixture is warm to the touch, 2-3 min.

Transfer bowl to an electric mixer fitted with the whisk attachment. Mix on medium-high speed until stiff peaks form. Mix in peppermint extract.

Using a new small paintbrush, paint 2 or 3 stripes of red food coloring inside the prepared bag. Fill bag with meringue. Pipe small (3/4"-high) drops onto prepared baking sheets.

Bake cookies until crisp but not brown, about 2 hr. (depending on your oven). Let cool completely on sheets on wire racks.

I found that leaving the pan in the oven (with the heat off) overnight helped the meringues get really crisp -- they can get chewy if they absorb moisture from the air/aren't 100% baked through.


Sunday, January 8, 2012

Seasons (gr)eatings.

When I was little, the approaching holidays always meant one afternoon of breaking out the cookie cutters, rolling pins, and sheet trays to make our stand-by Christmas treat: sugar cookies. My mom had this recipe from an old magazine that we used year after year, making chocolate and nut-covered logs, Christmas tree-shaped cutouts decorated with colorful ice cream toppings as ornaments, snowmen with chocolate-dipped top hats, angels, bells, stars, and teddy bears (that always took on a slightly frightening look because we used mini M&Ms for eyes that looked unnaturally large compared to the rest of the body -- I remember a particularly scary blue-eyed bear one year). My mom also made Swedish tea log, lemon squares, almond crescents, rum balls, and peppermint bark. We (or rather, she) would wrap them all up in colorful paper or cellophane bags and give them as gifts to friends, neighbors, bus drivers, homeroom teachers, music teachers, and coaches. (We would keep the other six dozen or so in tins that lasted until my mom would give up and freeze them sometime around February.) Over the years, our tastes matured away from our old sugar cookies, but I still find myself missing the making and decorating of cookies while drinking hot chocolate from my perch on a kitchen chair.

The first Christmas I lived alone, I was feeling nostalgic and decided to make treats of my own to send to friends and to bring to the office (I have a slightly less personal relationship with DC bus drivers than the one who picked me up and dropped me off every day for four years of middle school). You could say I've continued the tradition on my own over the years, taking an early-December trip to the Container Store (my Mecca) to pick out tins, boxes, cellophane bags, and ribbon to package my goodies, and then spend a weekend baking and assembling packages to deliver and mail.

This year's boxes contained some familiar items: my mom's lemon squares, a modified rum ball, chocolate bark, and a few other items including mini versions of my Halloween Snickers cookies (back by popular demand). From the reviews, it was another successful year (aided significantly by the arrival of my new mixer, without which the homemade marshmallow would not have been possible).

Homemade graham crackers (surprisingly easy to make and surprisingly faithful to the original taste) for "S'more" cookies:

...Sandwiched with homemade marshmallow and drizzled with chocolate: 

Rum ball remix, three ways: 1) creme de cacao, 2) Grand Marnier, or 3) brandy, dipped in chocolate: 

Dark chocolate bark with toasted almonds and fleur de sel, inspired by these Ghirardelli morsels: 

Every year I get a little anxious -- that the chocolate won't set, the booze will ooze, the cookies will all shatter by the time they arrive at their destinations (I learned the hard way the virtues of careful packaging). But the phone calls and e-mails I get upon receipt reassure me they've arrived in one piece, as well as remind me of the reason my mom did it/why I do it today: to spread holiday cheer and thank the people we're grateful to have in our lives.

Saturday, December 10, 2011

Sugar and spice.

Like my friend and fellow food blogger Anna, who has been posting a spectacular string of pumpkin-themed recipes since early fall, I associate the holidays with pumpkin. I made these over Thanksgiving when I stayed with Nick's family, but they may make a guest reappearance in the office this month. Now is the season when I get into a bit of a baking frenzy (I've been training all year), so friends, coworkers, and family: look out for some baked delights over the next few weeks. Faithful blog followers, I'll try to capture the recipes and photos here as well.

These cakey, poofy cookies balance a buttery-sweet icing with sharp spices highlighted by ginger. For those of you thinking of sending baked goods this season, these travel very well because they're so cakey and poofy. (Just make sure the icing has time to set before packaging.)

~

Pumpkin Cookies with Brown Butter Icing
(by Martha Stewart)


2 3/4 c all-purpose flour
1 t baking powder
1 t baking soda
1 1/4 t coarse salt
1 1/2 t ground cinnamon
1 1/4 t ground ginger
3/4 t ground nutmeg
3/4 c (1 1/2 sticks) unsalted butter, softened
2 1/4 c packed light-brown sugar
2 large eggs
1 1/2 c canned solid-pack pumpkin (14 ounces)
3/4 c evaporated milk
1 t pure vanilla extract


4 c confectioners' sugar, sifted
10 T (1 1/4 sticks) unsalted butter
1/4 c plus 1 T evaporated milk
2 t pure vanilla extract

Preheat the oven to 375ºF. Whisk together flour, baking powder, baking soda, salt, cinnamon, ginger, and nutmeg in a medium bowl; set aside.

Put butter and brown sugar in the bowl of an electric mixer fitted with the paddle attachment. Mix on medium speed until pale and fluffy, about 3 minutes. Mix in eggs. Reduce speed to low. Add pumpkin, evaporated milk, and vanilla; mix until well blended, about 2 minutes. Add flour mixture; mix until combined.
Transfer 1 1/2 cups batter to a pastry bag fitted with a 1/2-inch plain tip (such as Ateco #806; I found that taking a gallon Ziploc bag and cutting off the corner worked just fine too and made for easy clean-up). Pipe 1 1/2" rounds onto parchment-lined baking sheets, spacing 1" apart. Bake cookies, rotating sheets halfway through, until tops spring back, about 12 minutes. Cool on sheets on wire racks 5 minutes. Transfer cookies to wire racks; let cool completely.

Make icing: Put confectioners' sugar in a large bowl; set aside. Melt butter in a small saucepan over medium heat. Cook, swirling pan occasionally, until golden brown, about 3 minutes (don't be afraid - I don't think I browned my butter quite long enough, as it lacked a tiny bit of the nutty flavor I was going for, but do keep an eye on it so it doesn't burn). Immediately add butter to confectioners' sugar, scraping any browned bits from sides and bottom of pan. Add evaporated milk and vanilla; stir until smooth. Spread about 1 teaspoon icing onto each cookie.

Friday, October 28, 2011

Trick or treat.


Snickers Bar: Hey, Almond Joy, what are you going as for Halloween?
Almond Joy: Hm...good question. Do you want to go as something together?
Snickers Bar: Sure! I have an idea -- let's dress up as cookies.

In observance of Halloween, this week I baked cookies inspired by candy bars:

  • "Almond Joy": chocolate cookie with coconut, toasted sliced almonds, and chocolate chips
  • "Snickers": a sandwich cookie (one side peanut butter cookie, one side chocolate cookie) filled with vanilla buttercream and finished with a caramel drizzle
And now for a brief a lesson in cooking safety: I keep sugar and flour in big glass jars on my counter, because that makes staple ingredients easily accessible (and it looks pretty that way on TV). I had just removed the first batch of Almond Joys from the oven when I started sifting flour for the chocolate half of the Snickers batch. As I was pushing the last bits of flour, cocoa, baking soda, and baking powder through the sieve, I cut my finger on a tiny splinter of glass. I immediately inspected my flour jar and located a tiny chip in the glass edge. I didn't know which was more horrifying: the idea that I had to throw away all of those cookies or just how much a tiny glass cut can bleed. Tip for new bakers:don't for a moment second-guess whether or not you should serve baked goods which risk containing broken glass (no matter how much work the first batch required). I tossed the cookies, flour, and jar in the trash.

Fortunately I had another unopened bag of flour in my pantry, so I was able to re-make the cookies. If I do say so myself, they were quite popular in the office the next day.


~
Base cookies all by Martha Stewart. Adapted for candy bar versions by me. I only used half recipes of the PB and chocolate cookies since I was going to sandwich them together.

Peanut Butter Cookies

1 c all-purpose flour
1/4 t coarse salt
1/4 t baking soda
4 T unsalted butter, softened
1 1/4 c packed light-brown sugar
1 large egg
1 t pure vanilla extract
1 c smooth peanut butter
1 c salted whole peanuts - for a fabulous peanutty crunch

Preheat oven to 350°F. Sift together flour, salt, and baking soda. Put butter and sugar in a (different) bowl of an electric mixer; mix on medium speed until pale and fluffy, about 2 minutes. Mix in egg, vanilla and peanut butter. Fold in flour until combined (don't overmix). Stir in peanuts.

Drop 2 teaspoons of dough on baking sheets lined with parchment paper, spacing about 3" apart. Lightly flatten to 1 1/2" in diameter. Bake cookies, rotating sheets halfway through, until edges are just golden, about 13 minutes.


Chocolate Cookies
1 1/4 c all-purpose flour
3/4 c Dutch-process cocoa powder
1 t baking soda
1/4 t baking powder
1 1/2 c sugar, plus more for flattening cookies
10 T (1 1/4 sticks) unsalted butter, room temperature
1 large egg, room temperature

Preheat oven to 375°F. Into a medium-size bowl, sift together flour, cocoa powder, baking soda, baking powder, and salt. In the bowl of an electric mixer, cream sugar and butter until light and fluffy, about 2 minutes. Add egg; beat to combine. Stir in flour completely without overmixing. Using a 1 1/4" ice cream scoop, drop dough onto parchment-lined baking sheets about 2" apart. Dip bottom of a glass in sugar; press to flatten cookies to about 1/8" thick. (Keep dipping the glass in sugar to avoid sticking.) Transfer to oven, and bake until cookies are firm, about 10 to 12 minutes, rotating baking sheets halfway through.


Double-Chocolate Coconut Cookies
1 c (2 sticks) unsalted butter, softened
1/2 c granulated sugar
3/4 c packed light-brown sugar
2 large eggs
1 t pure vanilla extract
1 3/4 c all-purpose flour
1/4 c unsweetened Dutch-process cocoa powder
1 t baking soda
1/2 t baking powder
1/2 t coarse salt
2 c white-chocolate chunks (about 9 oz) - I used semi-sweet to stay more true to an Almond Joy
1 3/4 c sweetened flaked coconut
1 3/4 c coarsely chopped walnuts, (about 6 oz) - I used almonds instead

Preheat oven to 350°F. Put butter and sugars in the bowl of an electric mixer; mix on medium speed until smooth, about 2 minutes. Mix in eggs, 1 at a time. Stir in vanilla. Sift flour, cocoa powder, baking soda, baking powder, and salt into a medium bowl. Mix into butter mixture well combined. Stir in chocolate, coconut, and nuts. Using a 1 1/2" ice cream scoop, drop batter onto baking sheets lined with parchment paper, spacing 2" apart. Flatten slightly. Bake until set (they'll still be very soft, but you should be able to touch without getting batter on your hands), 10 to 12 minutes. Let cool on sheets on wire racks 2 minutes.

Tuesday, September 6, 2011

Flour power.

At the end of a meeting marathon/spreadsheet extravaganza at work -- maybe on a long, rainy commute home -- do you ever daydream about quitting it all for the job of your dreams?

That's what Joanne Chang did.

The owner of Flour Bakery quit her job as a consultant to start a career in food and ultimately open the pastry shop she always wanted. Thank goodness she did, because now we can all enjoy the delicious eats and treats at Flour Bakery.

By this point, you already know about my love for sweets (need I hyperlink more words?), but Flour has everything from breakfast to dessert: fresh salads, seasonal soups, flaky-crust quiches, decadent granola bars, crusty bread, buttery croissants, mouth-watering tarts, light-as-air meringues, rich layer cakes...it's all baked in-house and absolutely delicious. They even have nightly "take-out" (if it makes it out of the shop) dinner specials which I have yet to sample but look spectacular. (I took a hasty photo in line while waiting to pay.)

I've been there a few times for breakfast, lunch, or a snack (or perhaps a snack food for breakfast...), but this time I focused on cookies. I picked out four to share:

(Pictured from back to front)
  • Ginger molasses: feeding my recent ginger addiction, I knew the sweet spiciness would hit the spot, and that the crunch from the big sugar crystals would be a perfect complement to the chewiness of the molasses cookie (I was right on both counts)
  • Cornmeal lime: chewy yet slightly crumbly, these soft golden clouds had a lovely acidic bite from the lime glaze (the only other cookies I've had with cornmeal are a favorite Italian recipe my mom makes, also paired with citrus...stay tuned for the recipe)
  • "Oreo": I had to resist the urge to twist the oversized cookies apart and lick out the cream filling -- buttercream deliciousness sandwiched between two slightly soft, slightly crumbly chocolate wafers (even though I didn't twist on anything, I totally got my wish)
  • Milk chocolate hazelnut: fans of Ritter chocolate and Ferrero Rocher, this one's for you: toasty, buttery hazelnuts and just the right amount of salt perfectly balanced against the creamy milk chocolate (better than any fancy chocolate I've had)
We should work hard to keep in business the company that drove this woman to follow her dreams.

Find Flour Bakery in one of three locations in the Greater Boston Area:
  • Fort Point Channel 12 Farnsworth St., Boston MA 02210
  • South End 1595 Washington St., Boston MA 02118
  • Central Square 190 Massachusetts Ave., Cambridge MA 02139

Tuesday, May 3, 2011

Can I have Samoa?

(Part II in my Girl Scout cookie series)

The Tagalongs/Peanut Butter Patties were a big hit at work...so I set my sights on the next troop: Samoas.

The recipe I started with was pretty true to form -- buttery, crumbly cookie, caramel, coconut, and chocolate. Seems pretty benign, right? But the process sounded much simpler than it was. Three of the weakest parts of my baking game:
1) Rolling out cookie dough (before you scoff, read on)
2) Tempering chocolate (the recipe claims you can just "melt" it)
3) Making caramel (I bought my first candy thermometer just this winter...the recipe didn't call for homemade caramel, but I figured I'd try it)

Challenge 1: Rolling out cookie dough.
The cookie dough was just as you might remember coming home in tubs from the baseball team: sweet, sticky, and a little grainy, where the brown sugar crystals gave the butter something to hold onto. Dip a spoon, finger, or--lets face it--ice cream scoop into the tub to retrieve a tasty reward. Now try rolling it out on a counter top. Cutting out a large circle, then a smaller circle. Then lifting the cut-out donut onto a baking sheet. Then baking it. You would run into the following issues at each stage:

Now try rolling it out on a counter top (not a chance, it's room-temperature butter, holding some sugar together -- it'll stick to the counter, the rolling pin, and anything else it touches). Cutting out a large circle, then a smaller circle (if you even get a cookie cutter to lift away from the counter cleanly, there's no way you'll get the smaller circle lifted out). Then lifting the cut-out donut onto a baking sheet (combine issues 1 and 2, and you'll get the idea). Then baking it (what should be a cookie with a hole in the center more closely resembles a puddle with a belly button).

Not so easily defeated, I employed a few simple weapons: parchment paper, a freezer, and a lot of patience. When you roll out the dough, simply squish the dough between two sheets of parchment with a rolling pin to desired thickness, and put it in the freezer for 10 minutes. Take your frozen dough sheet out (it will start to defrost again immediately), cut large and small circles (but don't try to remove them), and place the sheet back in the freezer for 10 minutes. Take the dough back out, pop the circles out and put the donuts on a baking sheet. Then pop the sheet back in the freezer for five minutes before attempting to bake. Fold dough scraps in on themselves (just using the parchment to squish it together), and repeat. Though time consuming, this process absolutely works.

Challenge 2: Tempering chocolate.
So I must confess, I've never properly tempered chocolate. The true process is pretty involved, and it involves a similar process to tempering steel, with the ultimate goal of rearranging the crystal structure to make a shiny, hard chocolate shell. If you don't temper your chocolate, you'll be much more subject to a soft, fingerprint-covered, melts-at-room-temperature chocolate blob. Our friends at Ghirardelli teach us how, but the lazy man's way involves rearranging how you assemble the cookie: a classic Caramel deLite involves a layer of chocolate on the bottom of the cookie, topped with caramel-covered coconut, striped with chocolate on top. You can only imagine trying to pick up such a cookie with un-tempered chocolate on the top and bottom. Instead, I glazed the top of each cookie with chocolate, which also helped keep the coconut from falling off the cookie (see below).

Challenge 3: Making caramel.
So the process itself is pretty simple: just melt some sweet and tasty stuff together and let it boil until it reaches a certain temperature. I was a little impatient and didn't let the candy reach exactly 250*F (more like 245*F). This may have affected my sugar crystals to the point where they were still a bit grainy. No matter, still tasty. But the trouble came when I tried to spoon a "ring" of caramel-covered toasted coconut flakes onto a butter cookie. not only did the candy solidify too fast to move, but there was so much butter in both the cookie and the caramel that the coconut just wouldn't stick. When I tried applying firmer pressure, my delicate, painstakingly baked butter cookie crumbled. After a little swearing and a lot of broken cookies, I decided to rearrange my decoration structure (see above). For the real perfectionists among us, use a pastry tip to retain the hole in the middle of the cookie, and build the caramel-y-coconut around it.

Valuable lessons learned...I'll know better next time.

~

Homemade Samoas (a.k.a., Caramel deLites)
Cookies: 1 c (2 sticks) butter, softened
1/4 c granulated sugar

1/4 c light brown sugar, packed

2 c all purpose flour

1/4 t baking powder

1/2 t salt

1/2 t vanilla

1 T milk or cream

Topping:
14 oz caramel (recipe below)
1/2 t salt

3 c shredded, sweetened coconut, toasted

16 oz semisweet or dark chocolate

Caramel:
(makes a lot...about 2-3x what you need, but it's troublesome, so make a batch and use the rest for something else)
2 c white sugar

1 c packed brown sugar
1 c corn syrup

1 c evaporated milk
1 pt heavy whipping cream

1 c butter
1 1/4 t vanilla extract


Beat butter and sugars together with a mixer until light and fluffy. Sift flour, baking powder, and salt together. Add flour mixture in two parts. Stir in vanilla and cream, until well combined. Follow dough-rolling instructions above, and bake at 350*F for 10-12 minutes, until golden around the edges. Let cool.

Meanwhile, make caramel: bring to a boil all ingredients except vanilla.
Monitor the heat of the mixture with a candy thermometer while stirring. When the thermometer reaches 250*F, remove the pot from the heat and let cool slightly. Mix in coconut.

Dip cookies (the top side) in chocolate and place on a wire rack to allow excess chocolate to drip. Pile coconut on top. Using a pastry bag and small round tip (or, in my case, a Ziploc bag with a tiny corner snipped off), pipe stripes across the top of the cookie. Allow chocolate to set, and enjoy.

Monday, April 25, 2011

Just tagging along.

(Part I in my Girl Scout cookie series)

When we were little, my older sister was a Brownie -- to me, that meant trips to Lakeview Library while she went to meetings, colorful fabric badges I coveted but couldn't really decipher, and most importantly, the salty, crunchy, crumbly, creamy, chocolate-y goodness of Peanut Butter Patties.

We loved them all: Lemon Pastry Cremes (sadly no longer produced), Shortbread, Thin Mints, Caramel deLites (better known today as Samoas)...but my favorites were Peanut Butter Patties (now known as Tagalongs...perhaps appropriate for a little sister who always wanted to tag-along).

Now, I'm a cook by nature, but I've been trying to get more into baking -- an endeavor which has been fully exploited by my friends and coworkers who send me recipes to "test." The latest of which came in the form of Samoas. Unfortunately, the timing could not have been worse: it was day two of Lent, and day two of my self-imposed dessert desert. Wistfully poking around the Web site she sent me, I found a recipe for my beloved Peanut Butter Patties as well. And so, friends, it seemed only fitting that my Glorious Return to Dessert yesterday would be via one of my favorite childhood treats. I modified the recipe ever so slightly, adding a pinch more salt and making part of the batch with a Nutella filling instead of PB:

~

Homemade Peanut Butter Patties (a.k.a., Tagalongs)
Cookies: 1 c butter, softened
1/2 c sugar

2 c flour

3/4 t salt

1/2 t vanilla extract

1 T heavy cream


Topping: (one batch each, peanut butter and Nutella)

3/4 c smooth peanut butter/Nutella

1/4 c confectioner's sugar
1/4 t vanilla extract

6 oz semisweet chocolate chips

Cookie: sift dry ingredients together. Cream butter and sugar until fluffy; then combine dry ingredients in two batches, mixing until well incorporated. Add vanilla and cream, then mix until dough is a homogeneous mixture. Don't even attempt to touch the dough: using a big spoon, scoop into two batches on plastic wrap and flatten into disks. Refrigerate for at least an hour.

Preheat oven to 350*F. After chilling the dough, pinch off 1" balls and place on a parchment-lined baking sheet, about 3/4" apart. Bake for 10-14 min., or until golden around the edges. While the cookies are still hot and soft, use a soup spoon to make an indentation for the filling.

Topping: Meanwhile, heat peanut butter over low heat until it is a thick liquid, easy to stir. Add confectioner's sugar and remove from heat. When the sugar is incorporated, add vanilla (it might seize a little - particularly with the Nutella). Spoon a dollop into the hollow of cooled cookies.

Melt chocolate chips. Drop cookies face (filling) down into the chocolate, and rotate until the top is fully covered in chocolate. Set to dry on a wire rack (put a pan underneath to catch any chocolate drips). If necessary, freeze for half an hour to harden the chocolate quickly. (This will make your Peanut Butter Patty experience more like that of my childhood -- my mom froze them right when they arrived to keep this little piggy from eating the whole box at once...little did she know that I didn't mind them frozen.)

* NOTE: The Nutella plus chocolate makes for a sweet cookie -- I'd recommend using bittersweet chocolate to coat the Nutella varietal, or perhaps even dropping a hazelnut into the center.

Stay tuned for Samoas, coming up next.